 DrawRabbit
Drawing guide · Dragons
How to draw a sleeping dragon
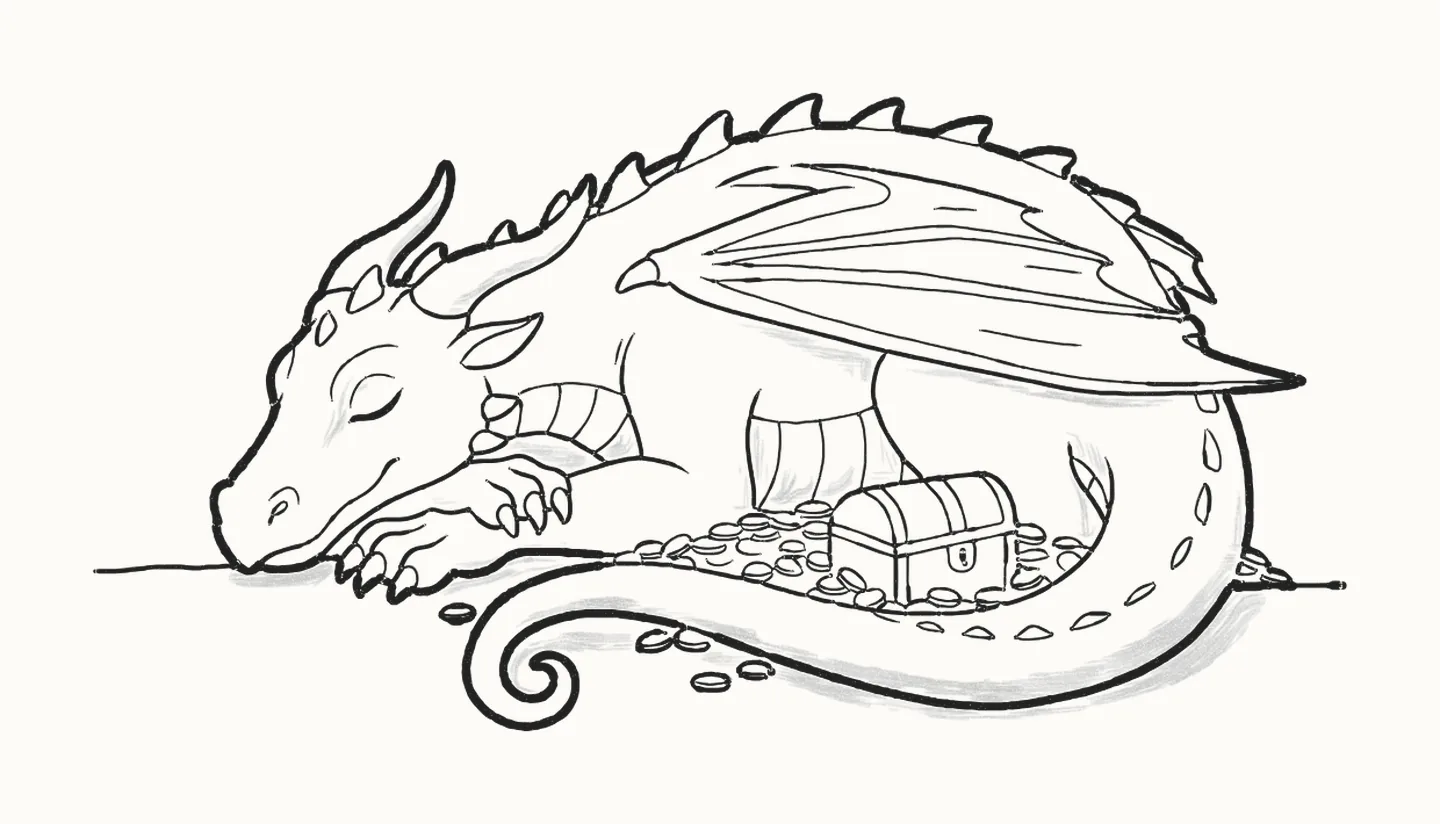
Shh. In 19 easy steps you’ll draw a dragon fast asleep on its gold, curled round a treasure chest, using a pencil and paper: a circle and a few curves to start, then the spikes, the coins and soft shadows.
How do you draw a sleeping dragon?
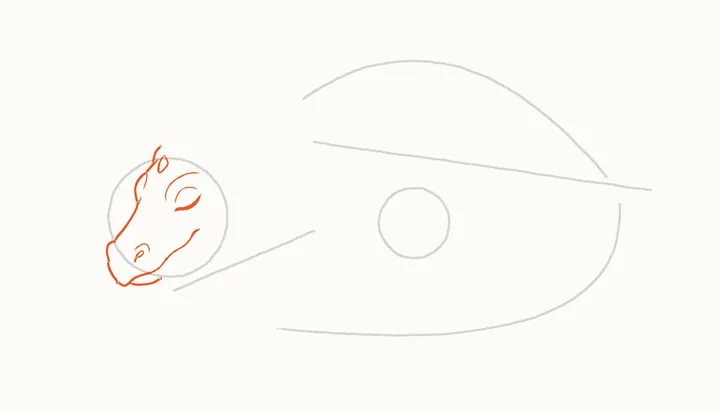
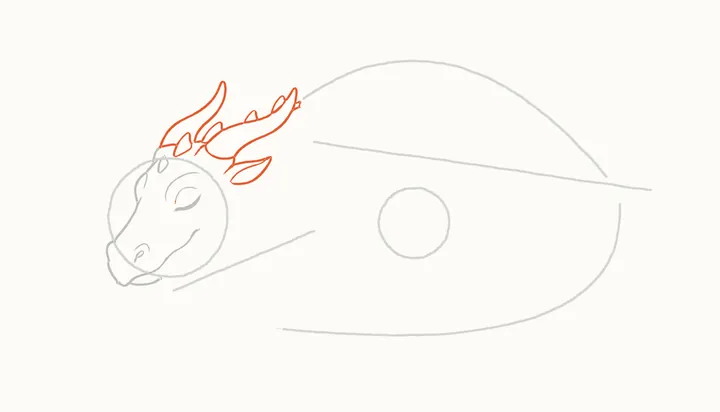
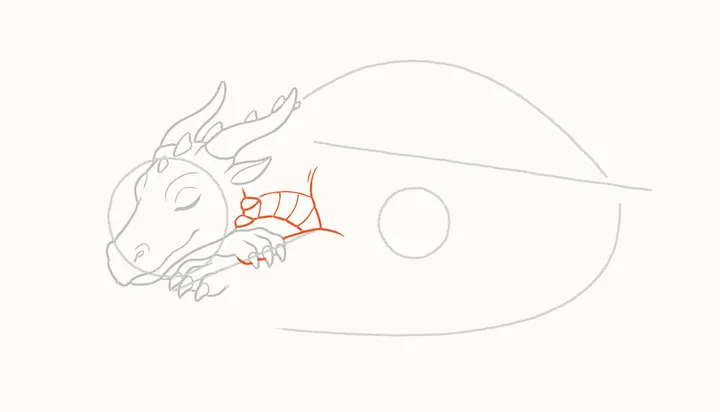
To draw a sleeping dragon, start with light lines: a circle for the head on the left, a long curve over the top for the back, and a slanting line for the folded wing. Add a line under the head for the front paws, a small circle for the back leg and one big curve for the tail, sweeping round to the front. Draw the head resting on its paws, with a long mouth line and a closed eye, then the horns and a pointed ear. Add the neck with its belly bands, a row of spikes along the back that get smaller as they go, the wing folded flat along the body, the striped back leg and the curled tail with a line of scales. In the curl of the tail, draw a little treasure chest, then heaps of gold coins, each a flat oval. Rub out the guides, go over the outline and add soft shadows. It takes 19 easy steps with a pencil, paper and an eraser.
You need a pencil, paper and an eraser19 stepsBeginner
Draw a sleeping dragon, step by step
In colour: what to draw nowGrey: already drawn
Draw everything in pencil, lightly at first. Save all 19 steps to Pinterest
-
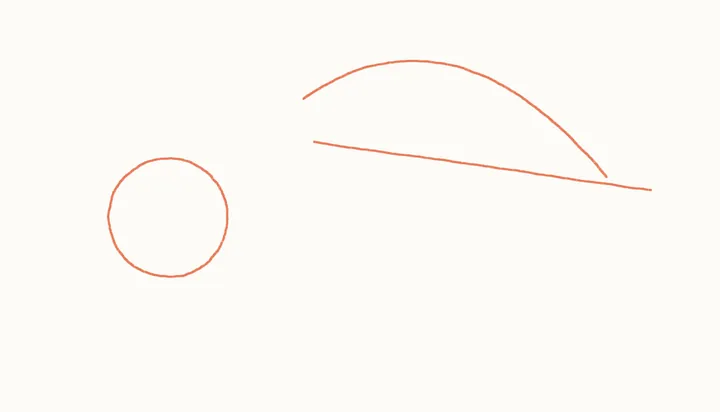
Step 1 of 19Guide lines
Head and body guides
Start with light lines. A circle for the head on the left, a long curve over the top for the back, and a straight line slanting down for the folded wing.
Draw these lightly: they’re only there to help, and you’ll rub them out in step 16.
-
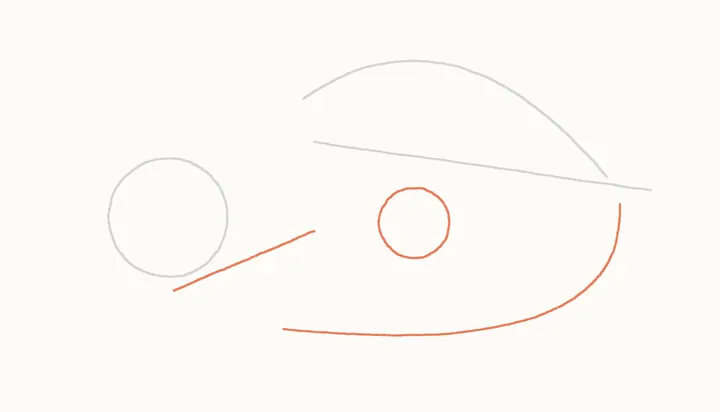
Step 2 of 19Guide lines
Paw, leg and tail guides
A line under the head for the front paws, a small circle for the back leg, and one big curve for the tail, sweeping down and round to the front.
Draw these lightly: they’re only there to help, and you’ll rub them out in step 16.
-
Step 3 of 19
The head
From the top of the snout, up over the brow to the back of the head. Then down the front, round the chin, and a long mouth line. Add the brow, nostril and closed eye.
-
Step 4 of 19
Horns and ear
Two horns sweeping back: the far one first, a little spike, then the near horn with two small spikes along its top. Then a pointed ear, tucked under the near horn.
-
Step 5 of 19
The front paws
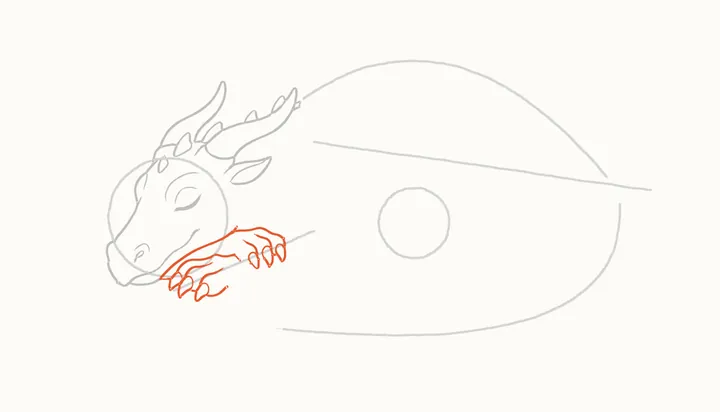
The head rests on its paws. The near arm runs under the chin, ending in curved claws. The far paw comes over the top of it, with three claws of its own.
-
Step 6 of 19
The neck
From the far paw, a line along to the chest, then up the front of the neck towards the ear. Then the belly bands: curved stripes across the underside of the neck.
-
Step 7 of 19
Spikes along the back
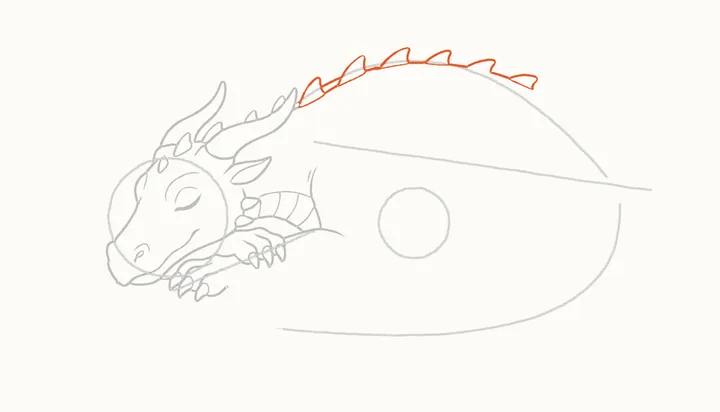
Start with a tall spike at the top of the back and work along, joining each spike with the back line. Add two smaller spikes on the neck, behind the horns.
-
Step 8 of 19
Down the far side
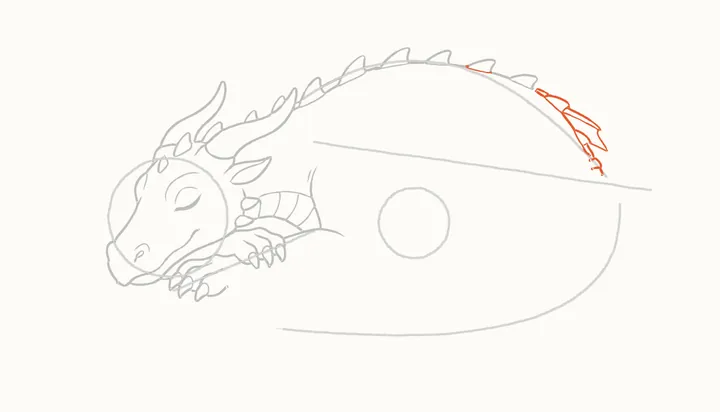
The back curves down towards the tail, with more spikes getting smaller as they go. Start low down and work your way up the curve.
-
Step 9 of 19
The wing
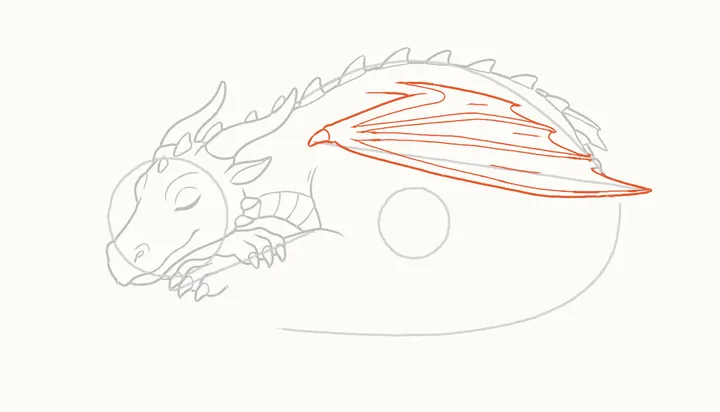
The wing is folded flat along the body. From its pointed tip, draw the long fold lines, then the bottom edge back to a knobbly wrist, and the wavy top edge.
-
Step 10 of 19
The back leg and tail
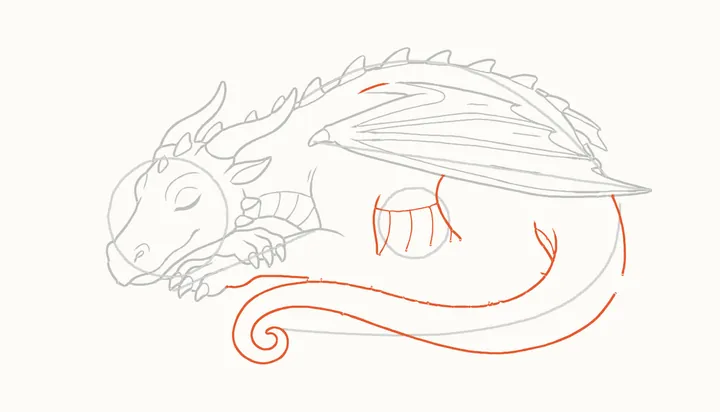
A striped back leg under the wing. Then the tail, lying in front of the body: from the paw into a curl, along the bottom and up, then its inner edge and a little fin.
-
Step 11 of 19
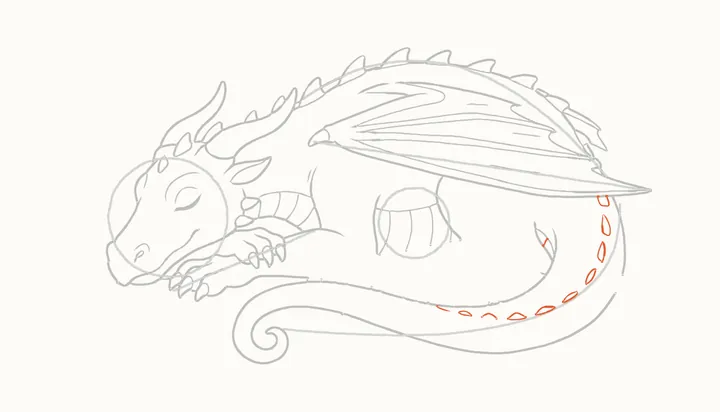
Tail scales
A line of small scales down the middle of the tail, following its curve. Keep them small and leave space between them.
-
Step 12 of 19
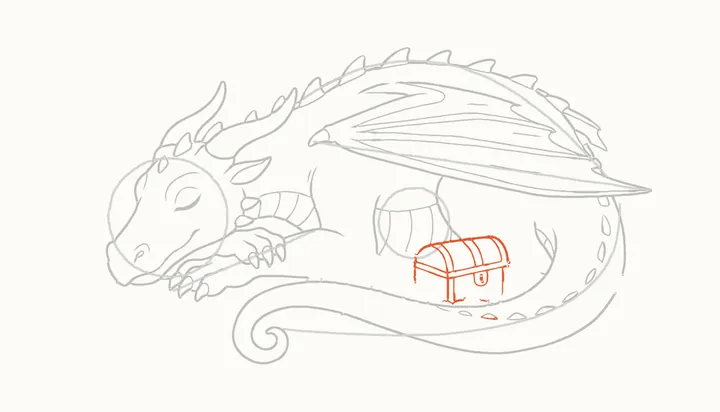
The chest
A little treasure chest in the curl of the tail: a rounded lid with bands across it, a box below with a strap and a keyhole plate.
-
Step 13 of 19
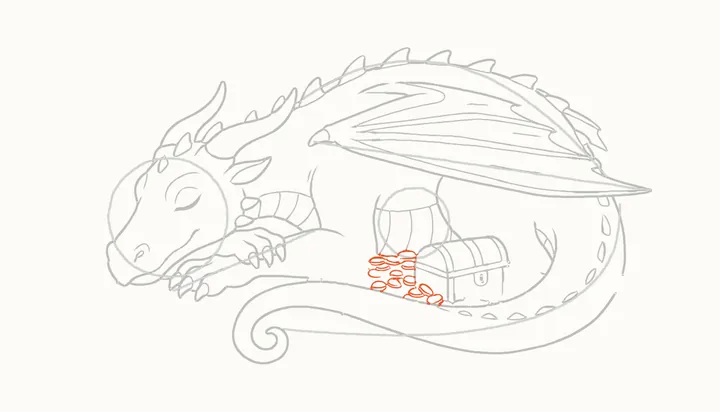
The gold
Now the coins, heaped round the back leg and in front of the chest. Each coin is a flat oval with a thin edge underneath. Let them overlap.
-
Step 14 of 19
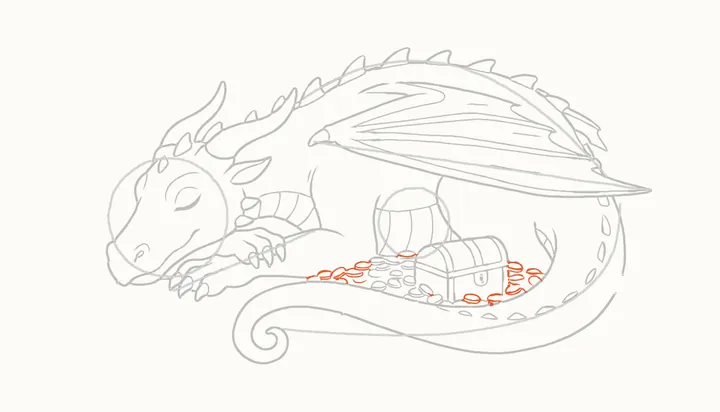
More gold
Spill the heap out along the tail towards the paws, then fill the gap to the right of the chest with a few more.
-
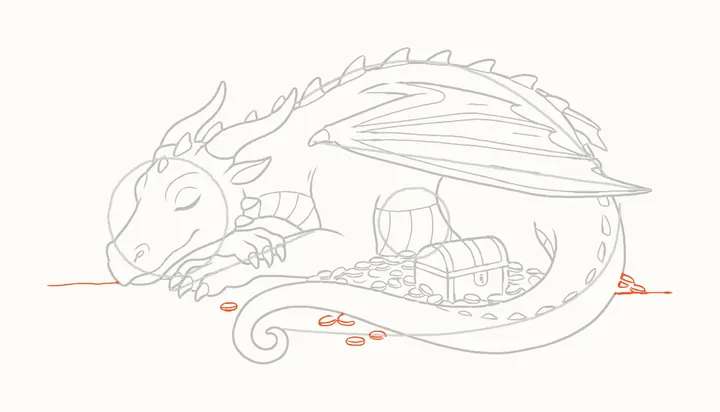
Step 15 of 19
Loose coins and the ground
A few loose coins on the ground in front of the tail, and a small pile on the right. Last, a simple ground line on each side.
-
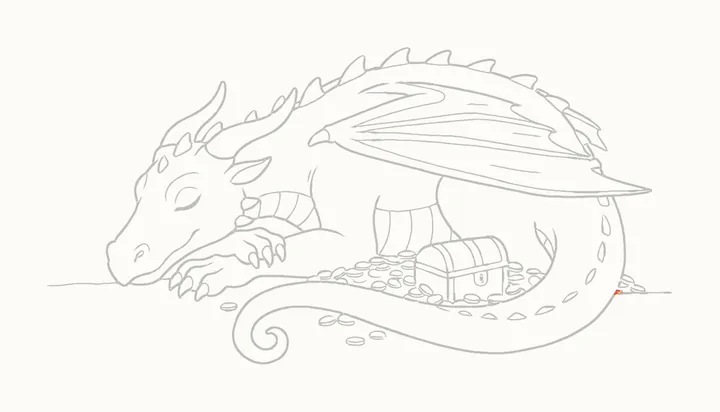
Step 16 of 19
Erase the guides
Rub out the guides. Only the dragon and its gold stay.
-
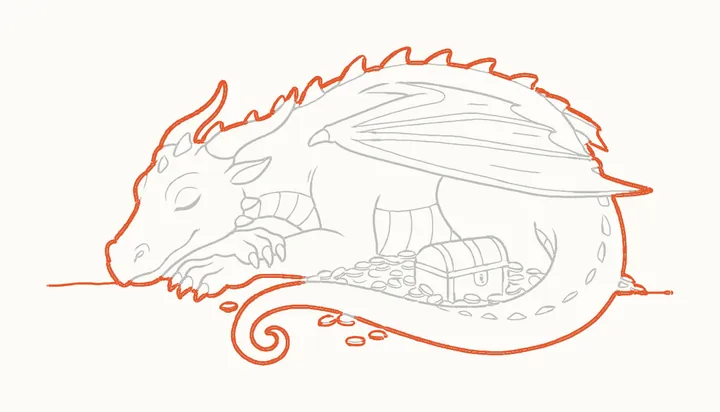
Step 17 of 19
Go over the outline
Press a little harder and go over the outside edge of the dragon, the chest and the coins, so they stand out from the lighter lines inside.
-
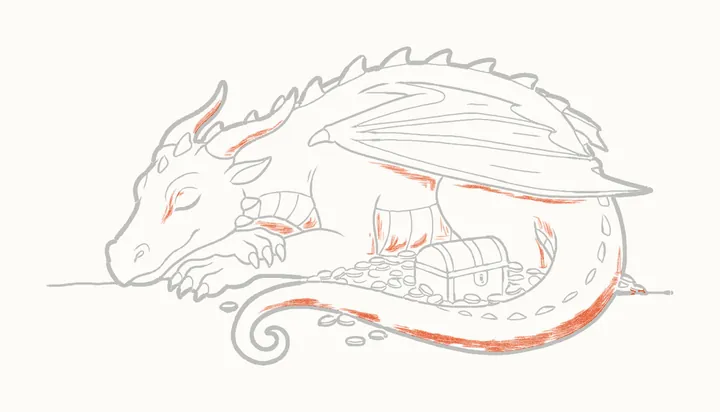
Step 18 of 19
Shadow side
Now a soft, even tone in the shadowy places: inside the horns, under the wing, on the back leg and paws, and along the tail. Keep the rest light.
-
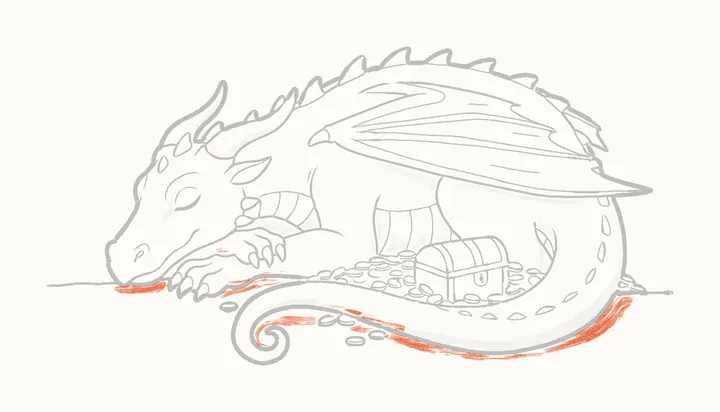
Step 19 of 19
Shadow on the ground
Last, a soft shadow on the ground where the dragon lies: under the chin and the paws, and along the bottom of the tail.
-
Finished
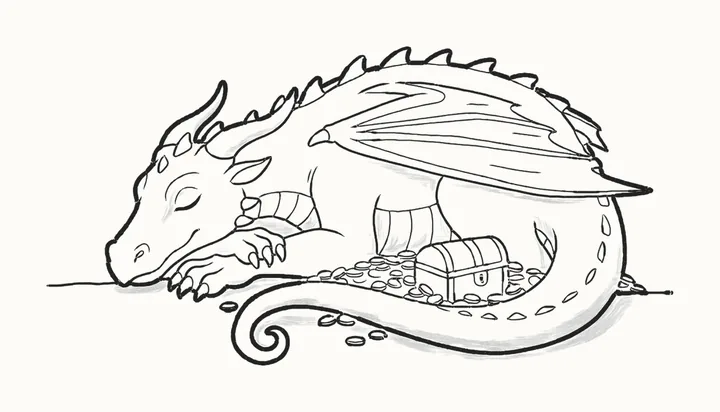
Your finished sleeping dragon
Your dragon is fast asleep! Go over any lines you want darker, then sign your drawing in the corner.
In the DrawRabbit app
The dragon world has 9 more drawings
Every animal has a whole world of narrated drawings in DrawRabbit, each one a little story you draw with a real pencil and paper. The first drawing in every world is free.
 Free to start · iPhone and iPad
 First flight
 The fire breather
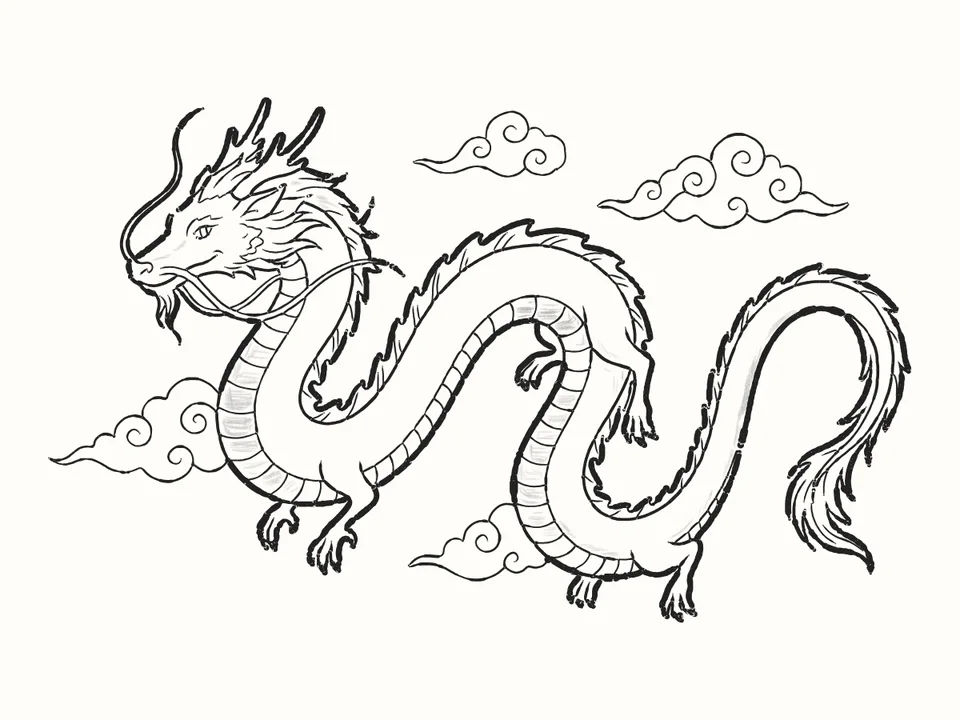 The cloud dragon
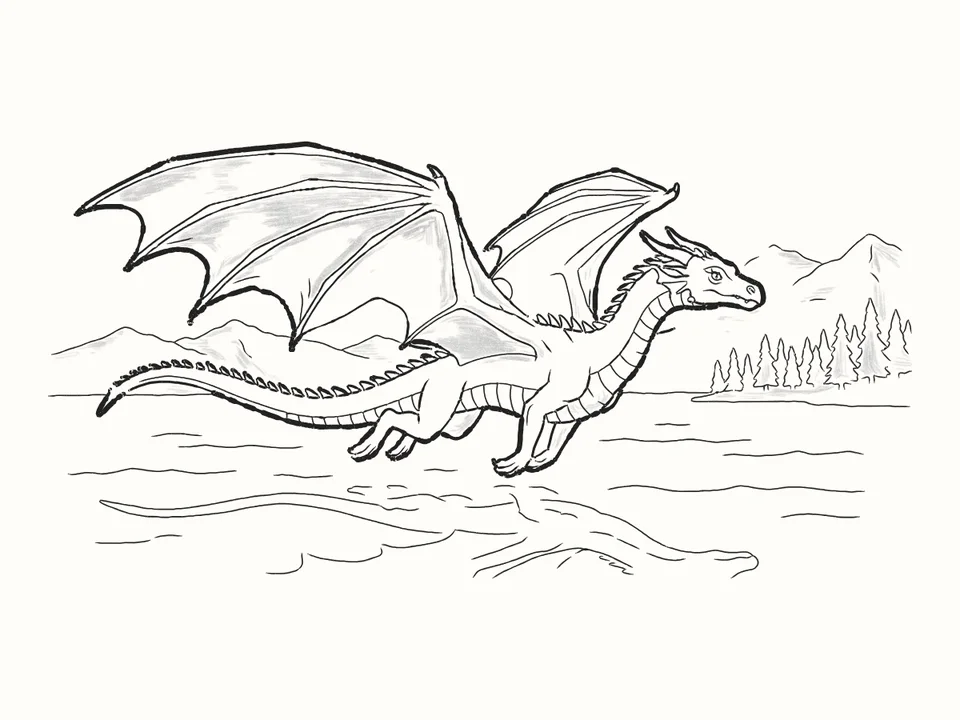 Over the lake
Tips for a better sleeping dragon
Head on the paws
The near arm runs under the chin and the far paw comes over the top of it: that’s what makes it look settled.
Spikes get smaller
Start with a tall spike at the top of the back; they get smaller down the far side towards the tail.
Coins are flat ovals
Each coin is a flat oval with a thin edge underneath. Let them overlap in heaps round the leg and the chest.
Soft shadows only
A soft, even tone inside the horns, under the wing, on the back leg and along the tail, and a soft shadow on the ground under the dragon.
Questions
Is a sleeping dragon easy to draw?
Yes. A circle for the head and a few long curves for the back, the wing and the tail set the shape, and the coins are just flat ovals.
What do I need?
A pencil, paper and an eraser. Draw the first steps lightly: the guide lines are rubbed out in step 16.
How do I make a dragon look asleep?
Rest its head on its paws and draw the eye as a closed curve, with a long, relaxed mouth line. The wing lies folded flat along the body and the tail curls round to the front, so the whole dragon is tucked in.
Can kids draw it?
Yes. It’s made for beginners of any age. If reading the steps is hard, the draw-along talks you through each line while it draws.
What is DrawRabbit?
A drawing app for iPhone and iPad: narrated, step-by-step lessons you follow with a real pencil and paper. 95 drawings in 10 worlds, free to start, no account needed.
Keep drawing · Next guide
How to draw a fish in a bowl
A goldfish in a bowl in 31 easy steps
Start drawing