 DrawRabbit
Drawing guide · Dragons
How to draw a dragon sitting down
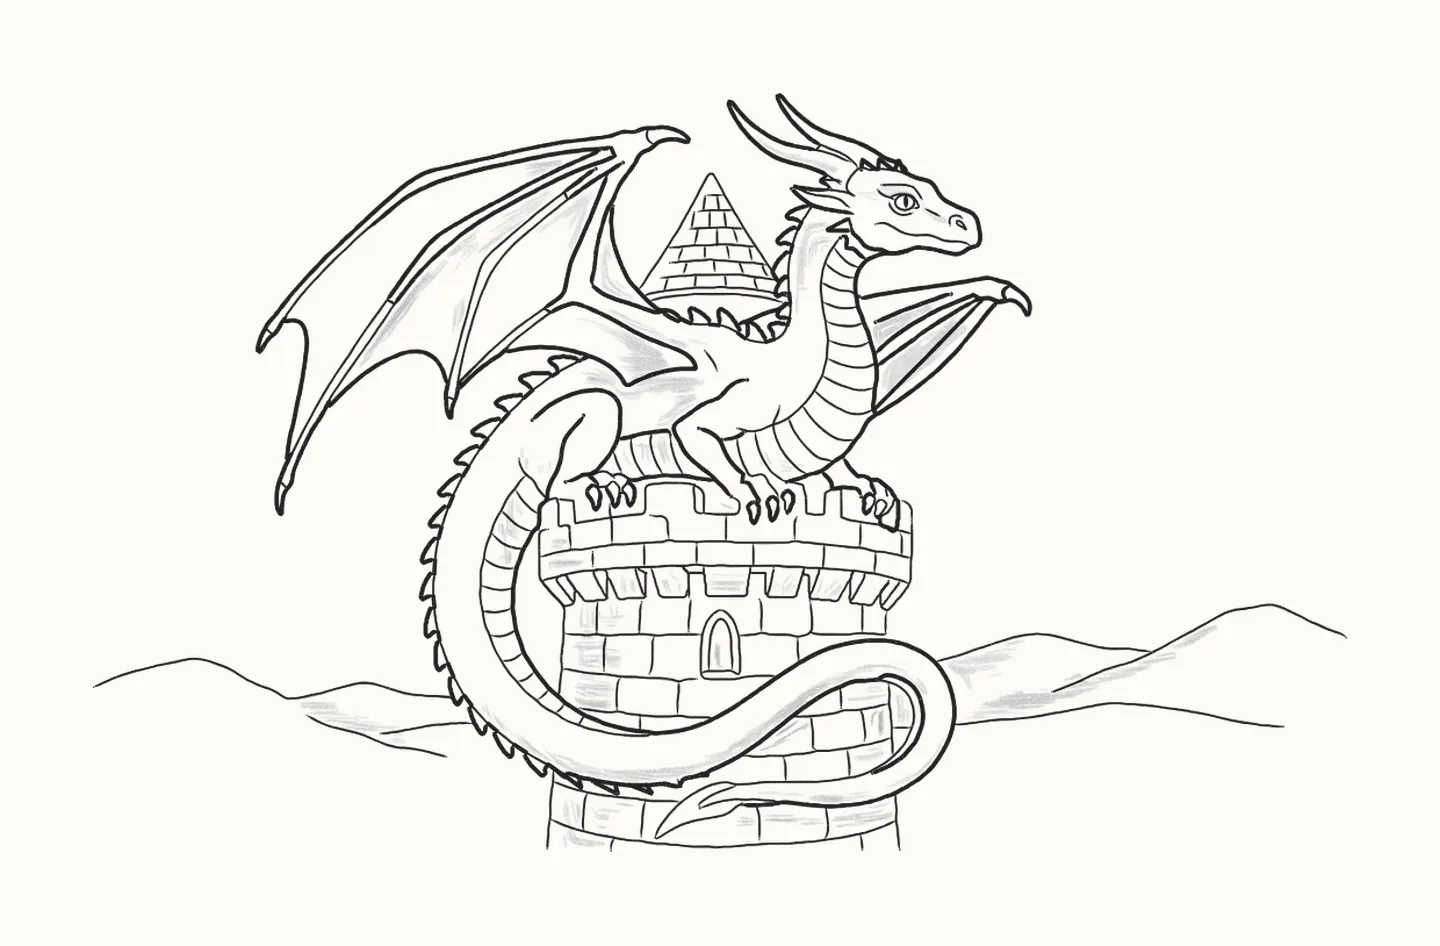
In 60 steps you’ll draw a dragon guarding his tower, perched on the top with his big wing raised and his spiky tail coiled round the stones, using a pencil and paper: a few light lines for the tower and two ovals to start, then his head, his wings, his tail and the castle, stone by stone.
How do you draw a dragon sitting down?
To draw a dragon sitting on a castle, start light with the tower: two long lines for its sides and a gentle curve across the top where his feet will rest. Add an oval for his head, up on the right, a long oval for his body along the top of the tower, a line up to the wing’s wrist with three lines fanning out to the tips, and one long curve for the tail, looping round the tower. Draw his head with its long snout, a pointed eye with a round iris and a thin slit, the brow and a teardrop nostril, a pointed frill, two horns and a spike on his cheek. Add the back of his neck and his back with their spikes and the front of his neck, then the big wing: its arm up to the wrist, two long fingers, the last bone and three scoops of skin, and the far wing peeking out behind his neck. Draw his legs with their claws hooked over the stone, the bands down his neck and belly, and the spiky tail coiling round the tower to its tip. Then the castle behind him: the battlements, the rows of stones, a ledge of blocks, a small arched window, a pointed tiled roof and the far hills. Rub out the guides and go over his outline. The light comes from the right, so shade the wing skin, under his belly, the inside of his tail and the left side of the tower, press harder inside the window, and fill in the slit in his eye to finish. It takes 60 steps with a pencil, paper and an eraser.
You need a pencil, paper and an eraser60 stepsBeginner
Draw a dragon sitting down, step by step
In colour: what to draw nowGrey: already drawn
Draw everything in pencil, lightly at first. Save all 60 steps to Pinterest
-
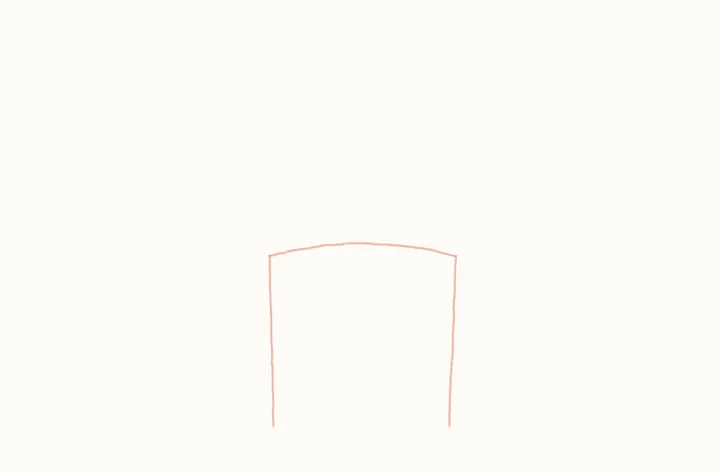
Step 1 of 60Guide lines
Tower guide
Start light with the tower he sits on: two long lines down for its sides, a little closer at the bottom, and a gentle curve across the top where his feet will rest.
Draw these lightly: they’re only there to help, and you’ll rub them out in step 45.
-
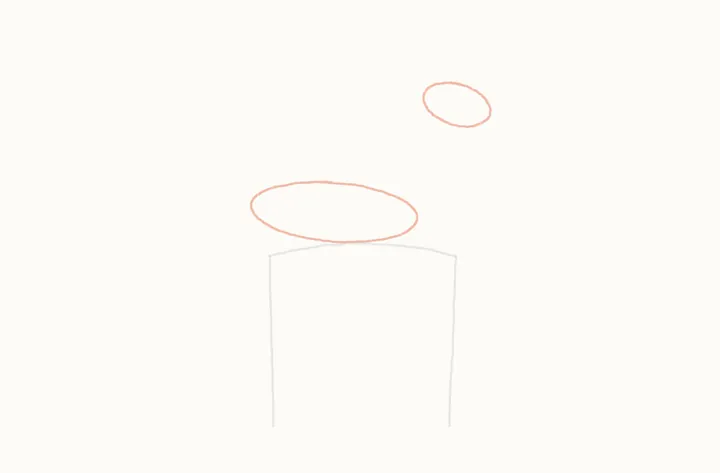
Step 2 of 60Guide lines
Head and body guides
Up on the right, an oval for his head, tipped down at the front. Then a long oval for his body along the top of the tower, down to the left of it.
Draw these lightly: they’re only there to help, and you’ll rub them out in step 45.
-
Step 3 of 60Guide lines
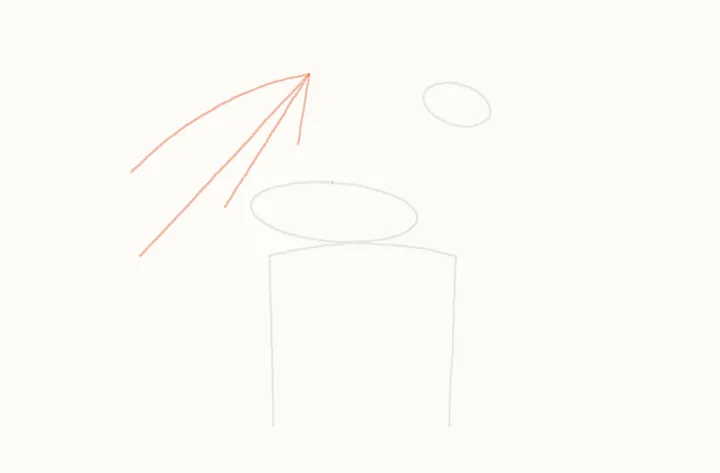
Wing guides
For the big wing: a line from his back up to the wrist, then three long lines fanning out from the wrist to the three tips, the lowest by the tower.
Draw these lightly: they’re only there to help, and you’ll rub them out in step 45.
-
Step 4 of 60Guide lines
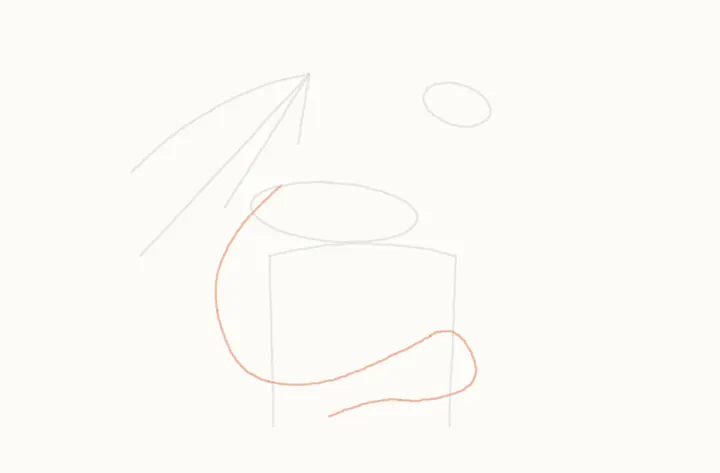
Tail guide
Then one long curve for his tail: from his hip, down the left of the tower, across the front of it, round a loop on the right and back to a point.
Draw these lightly: they’re only there to help, and you’ll rub them out in step 45.
-
Step 5 of 60
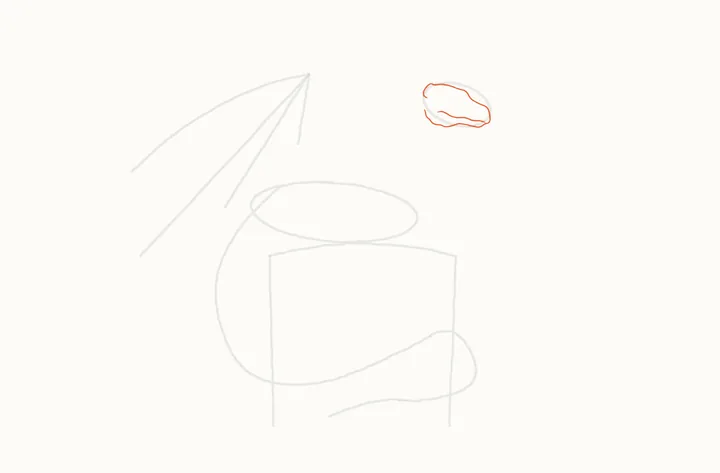
The head
From the back of his head, along the top and down his long snout, round his nose, then back under his jaw to his cheek. Then his mouth, from the front.
-
Step 6 of 60
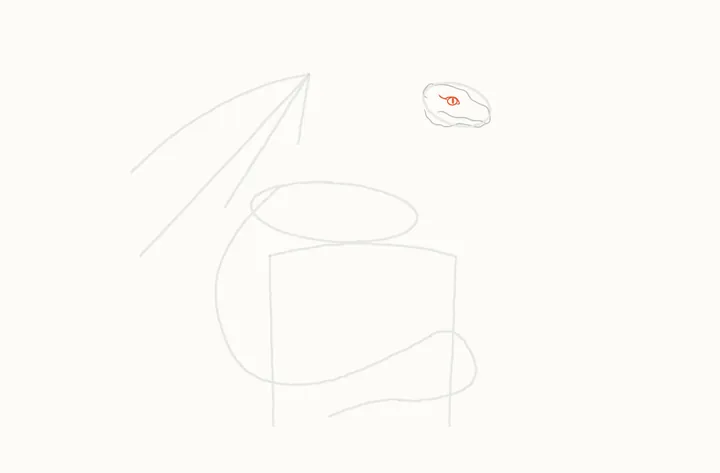
His eye
Halfway along his head, the eye: a line in to its pointed back corner, then the lids, round to the front corner and back. Then a round iris and a thin slit.
-
Step 7 of 60
Brow, crease and nostril
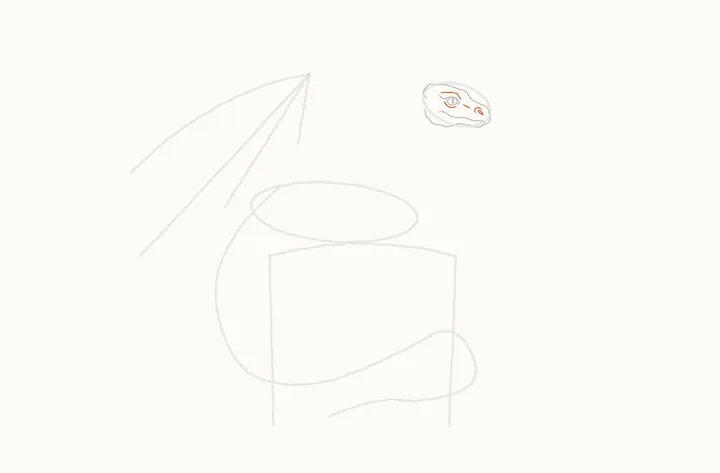
A curved crease under the eye, then the brow over it. Near his nose, a short line on his snout, then a little curve and a teardrop nostril under it.
-
Step 8 of 60
The frill
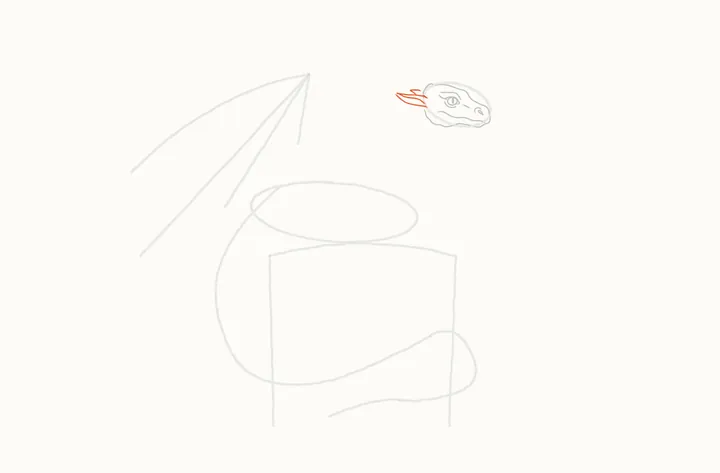
Behind his head, a long pointed frill: from his head out along its top to the point and back. Then the line under it, from his head out, and a small spike on top.
-
Step 9 of 60
The horns
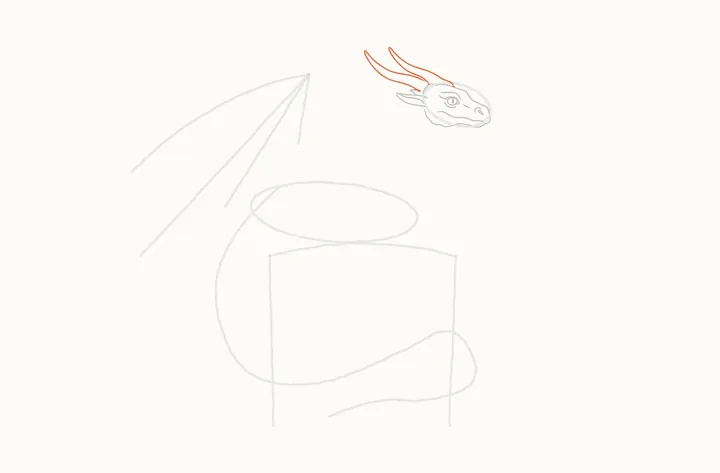
From the top of his head, the near horn: up its underside to the point and back down its top. Then the far horn behind it.
-
Step 10 of 60
Ridges on the horn
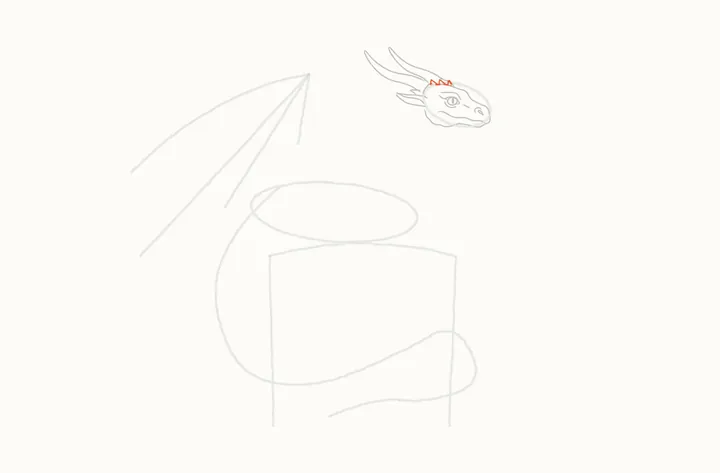
At the near horn's foot, a few little ridges in one zigzag along the top of his head.
-
Step 11 of 60
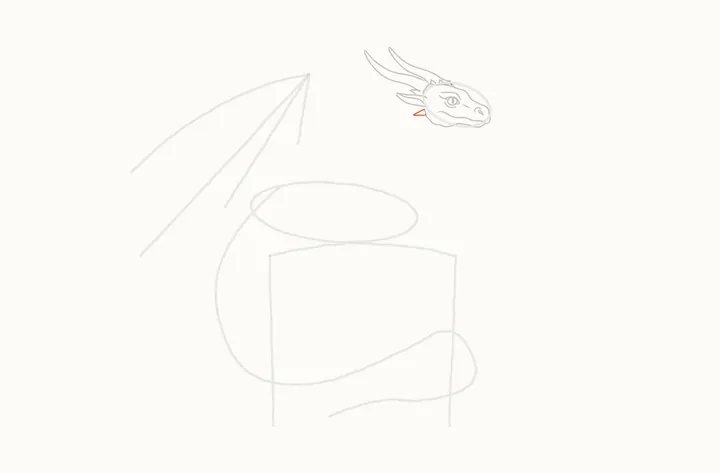
A spike on his cheek
Under the frill, a little spike on his cheek: from his jaw out to a point and back, pointing towards his neck.
-
Step 12 of 60
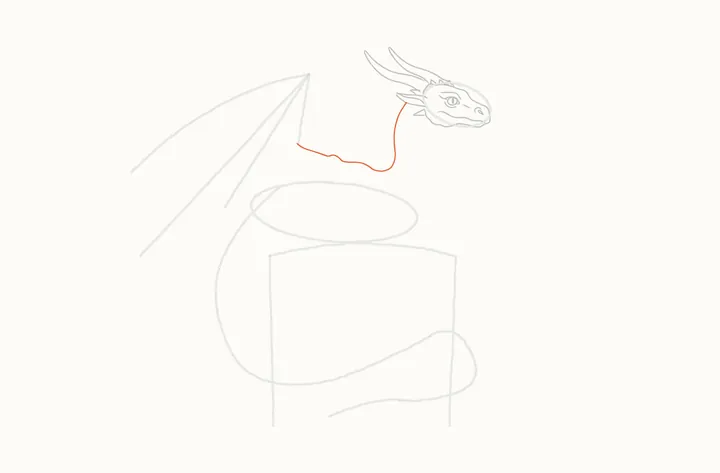
The back of his neck
From under the frill, one long line down the back of his neck, round at its foot and along his back to where the wing will start.
-
Step 13 of 60
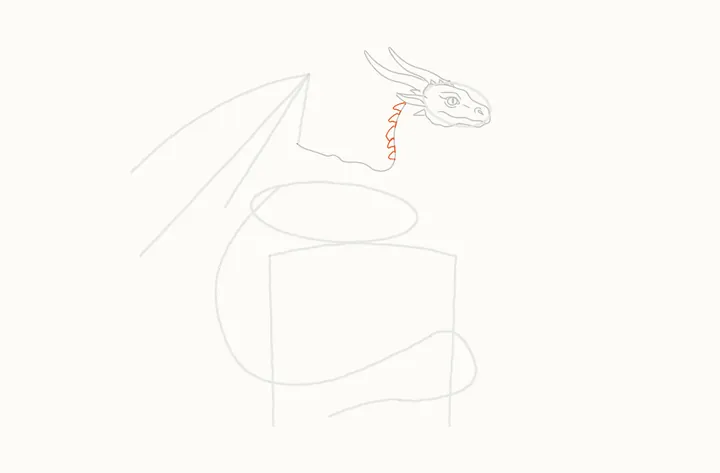
Neck spikes
Five spikes down the back of his neck, from under the frill, each out to a point and back to the line.
-
Step 14 of 60
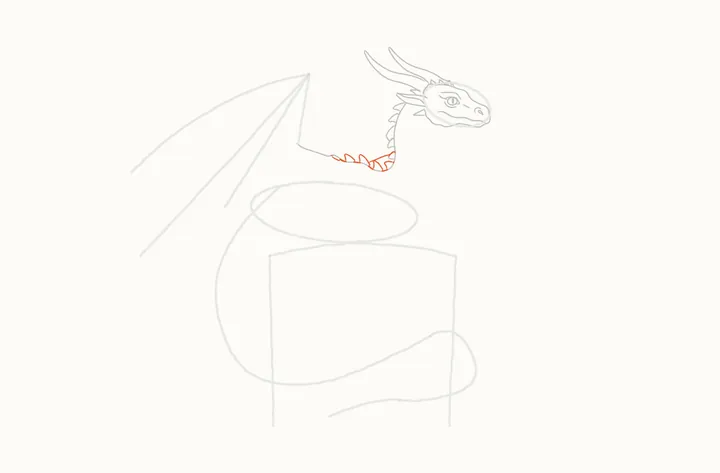
Spikes on his back
Five spikes along his back, from his neck towards the wing. Then, in the crook of his neck, a line from the neck down to the spikes.
-
Step 15 of 60
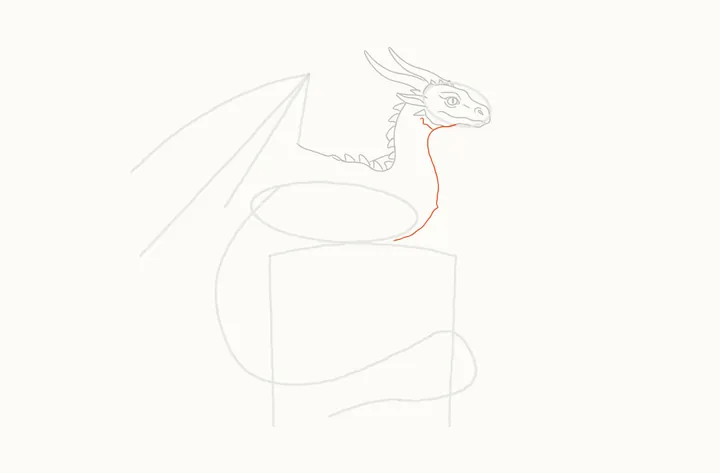
The front of his neck
From under his chin, down the front of his neck and chest to the front of the body oval. Then a short line from the cheek spike down to it.
-
Step 16 of 60
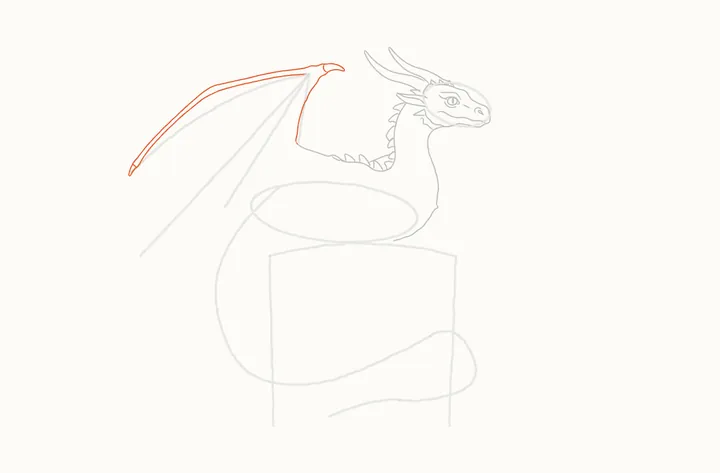
The near wing's edge
From his back, up the arm to the wrist, round its claw, along the top to the first tip and back inside it. Then short lines across the claws.
-
Step 17 of 60
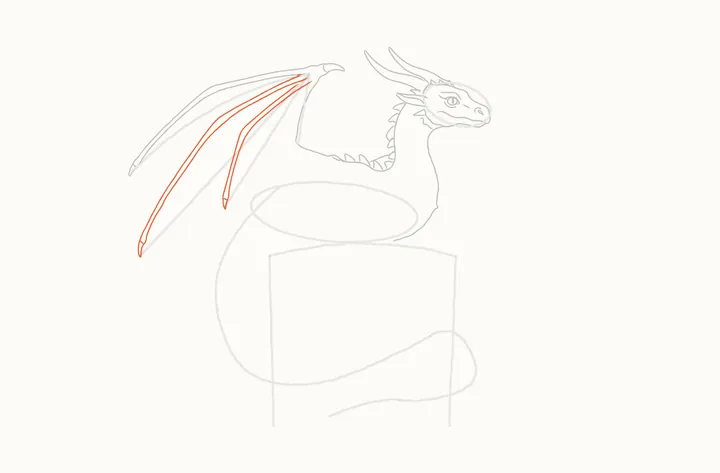
The wing's fingers
Two long thin fingers from the wrist: down to the second tip and back up, then a short line across its claw. Then down to the third tip and back, and across its claw.
-
Step 18 of 60
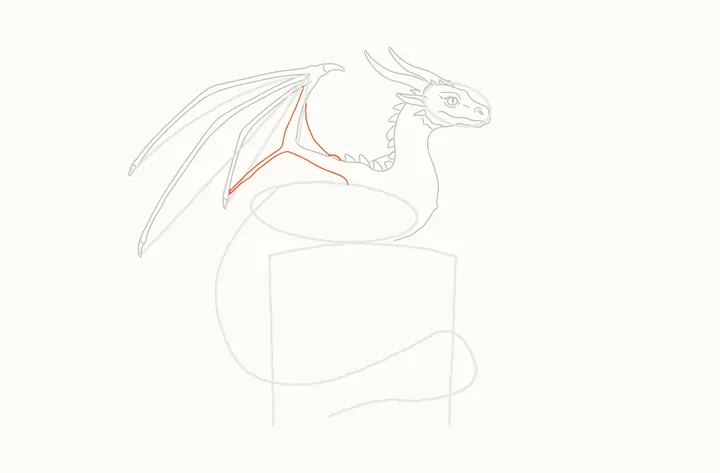
The wing's last bone
From the wrist, down the last bone to the third tip, back up its other side and along under the arm to his shoulder. Then a curve from his back up to the arm.
-
Step 19 of 60
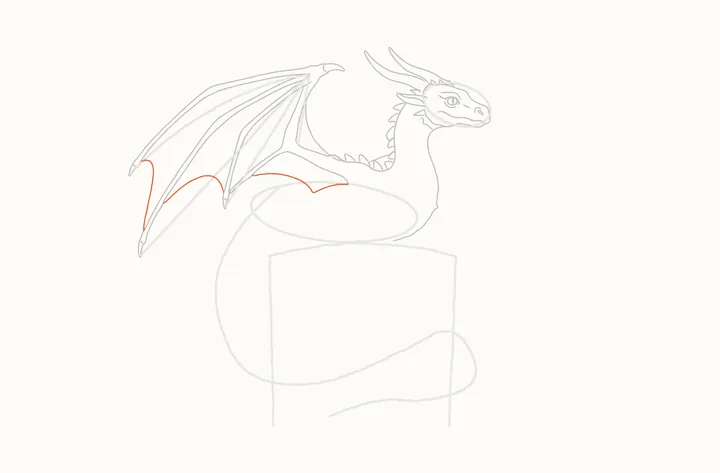
The wing's skin
Three scoops of skin between the tips: from the first tip down to the next finger, from the third tip to the second, and from the last bone to his body.
-
Step 20 of 60
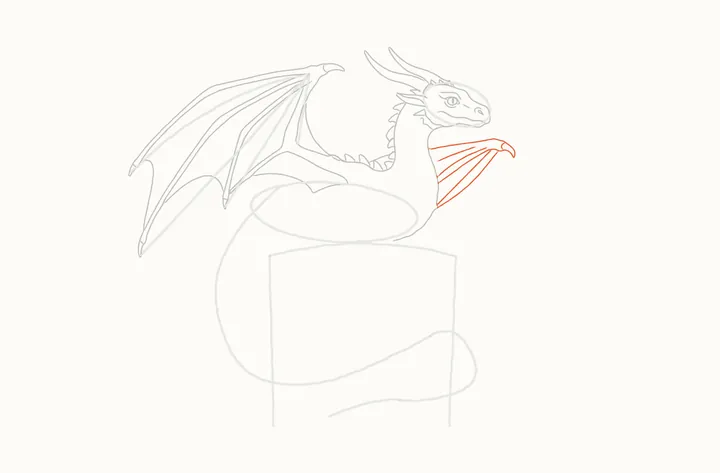
The far wing
Behind his neck, the far wing: from his neck out along its top, round the claw and back. Then the claw's foot, two lines along it, its lower edge, and a light line beside that.
-
Step 21 of 60
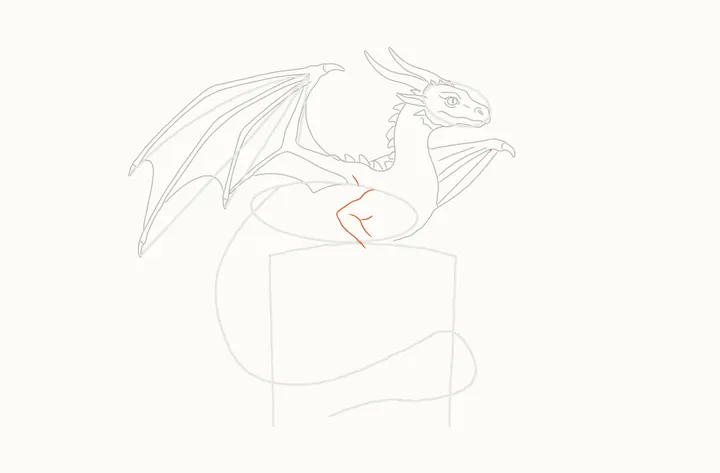
The near front leg
The near front leg: down its back from his shoulder to the heel, then its front from his chest to the foot. Then a short line at its top, and one on his shoulder.
-
Step 22 of 60
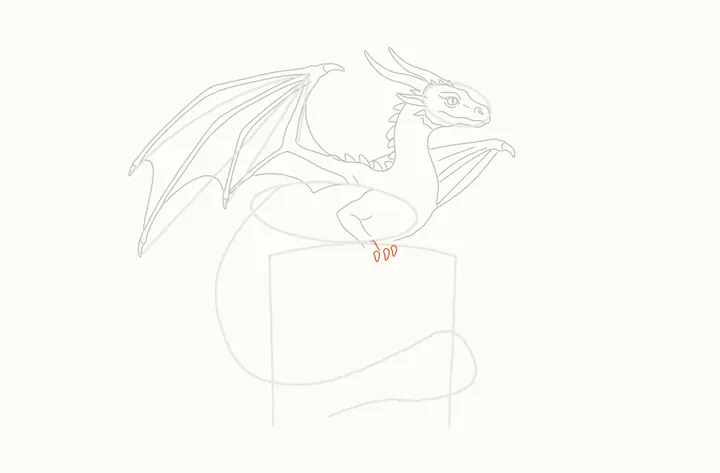
Toes and claws
One short toe line down from the leg, then three curved claws hooked over the stone, left to right.
-
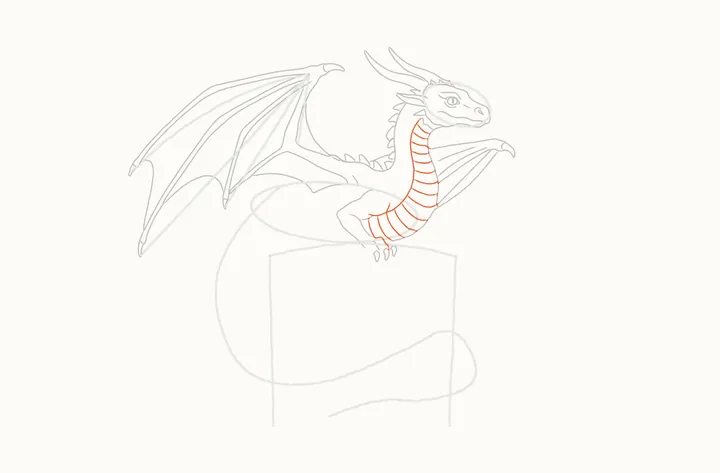
Step 23 of 60
Bands on his neck
Down his neck, the strip's edge, from under the cheek spike to the top of the front leg. Then fourteen bands across the strip, top to bottom, from its edge out to his throat.
-
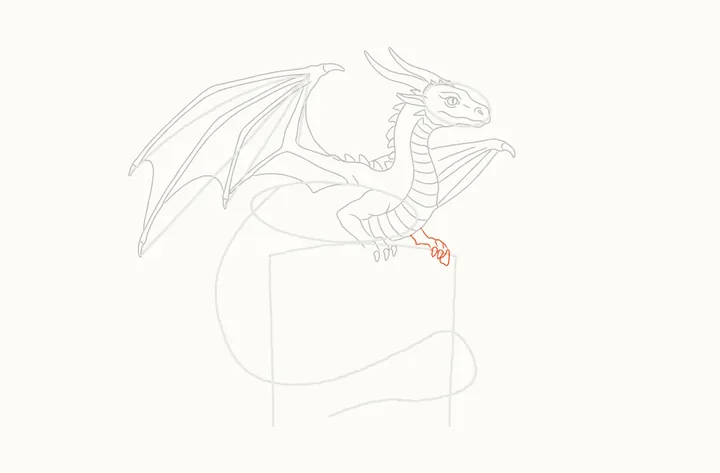
Step 24 of 60
The far front leg
The far front leg peeks out behind: a line down its back and along the top of its toes, then one down its front and under them. Then small toe lines and three claws.
-
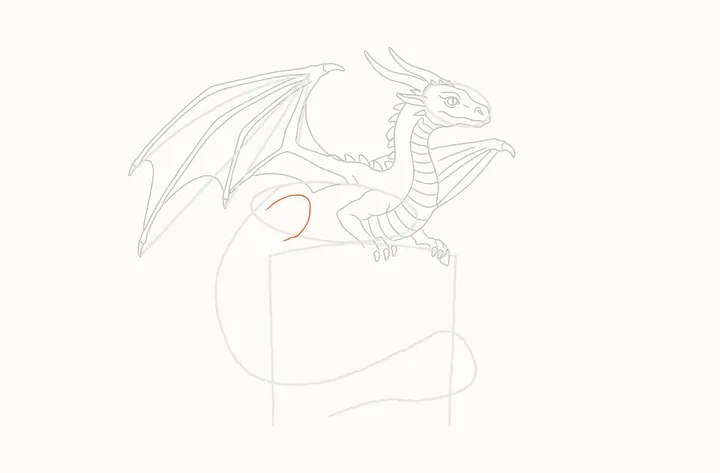
Step 25 of 60
The back leg
His back leg: from his tail, up over the big round thigh and down its front to the foot.
-
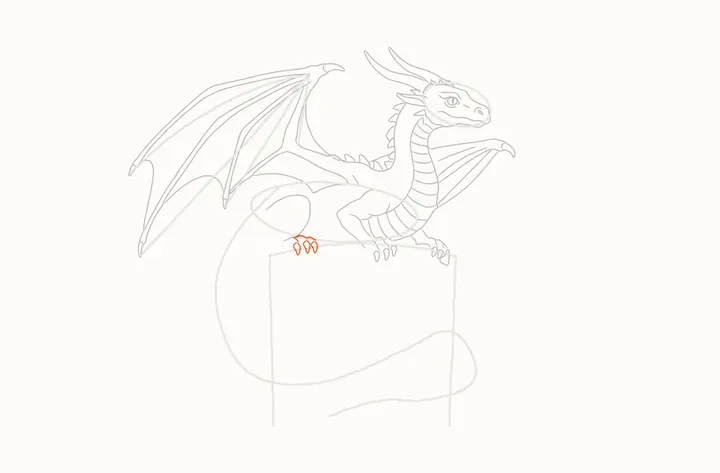
Step 26 of 60
Back toes and claws
Three short lines for the back toes, left to right along the top of the foot. Then three claws hooked over the stone under them.
-
Step 27 of 60
His belly
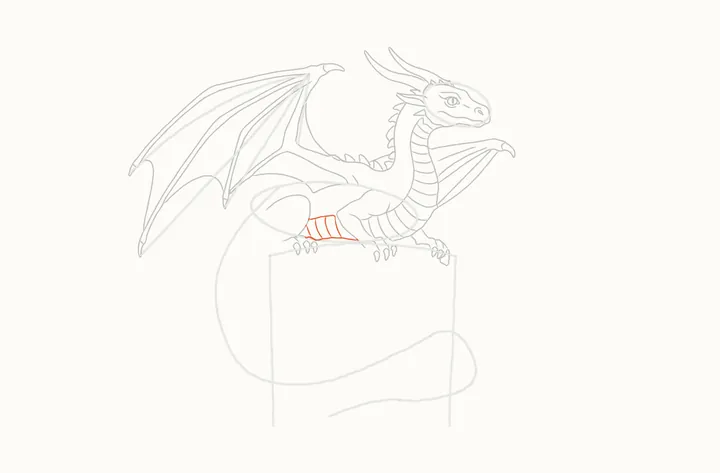
Between the legs, the belly strip: its top line, its bottom line, then the bands across it.
-
Step 28 of 60
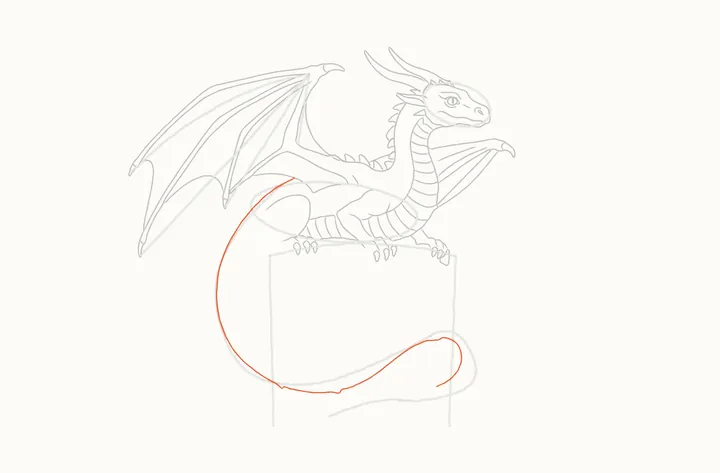
The outside of his tail
From his hip, one long line down the outside of his tail, then on along under the coil and up round the inside of the loop.
-
Step 29 of 60
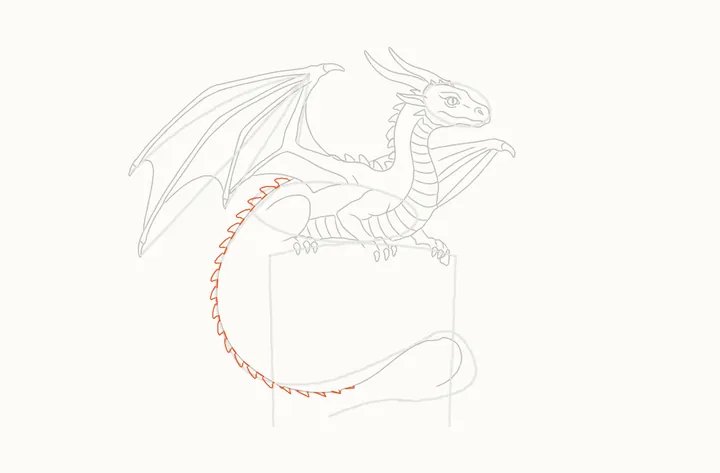
Spikes down the tail
Fifteen spikes down the outside of his tail, from his hip to the bottom, getting smaller. Then five small spikes under the coil, from the left, each down to a point and back.
-
Step 30 of 60
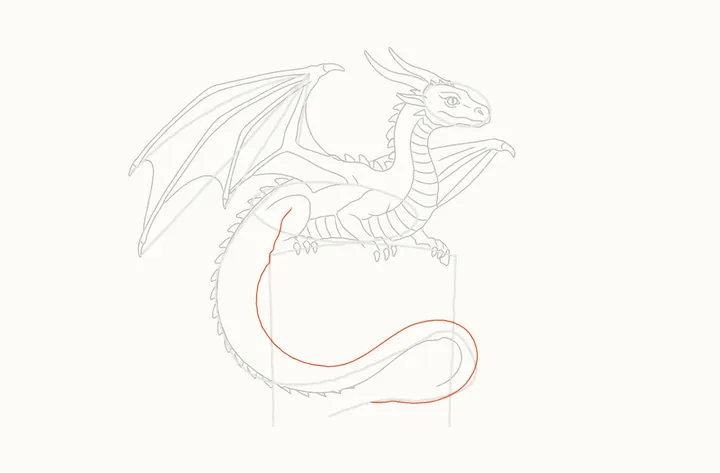
The inside of the tail
From the back of his thigh, the inside of the tail: down the tower's left side, across its front, round the outside of the loop and back along the bottom.
-
Step 31 of 60
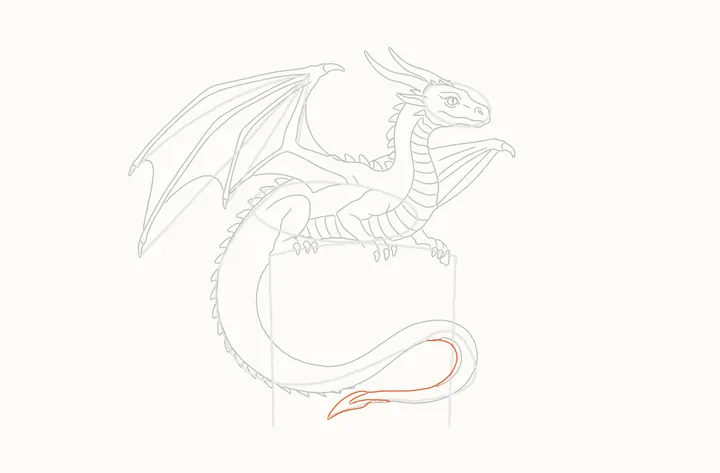
The tip
The tail's tip: from its point along its top edge and round inside the loop, then its bottom edge, and two lines inside it.
-
Step 32 of 60
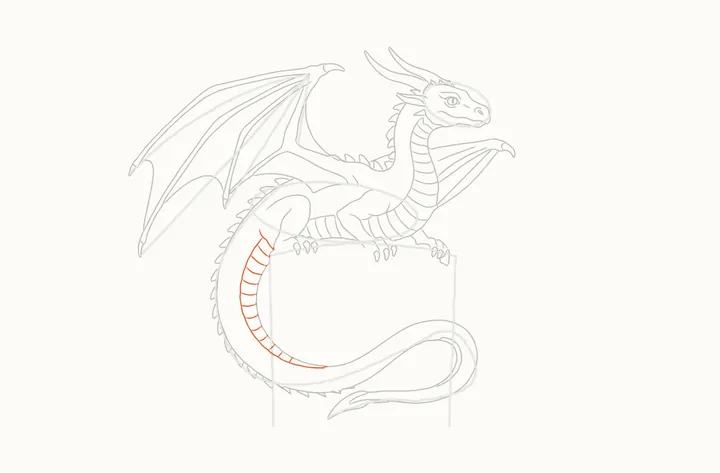
Bands on the tail
Down the inside of his tail, the strip's edge, from his hip to the coil. Then bands across it, top to bottom.
-
Step 33 of 60
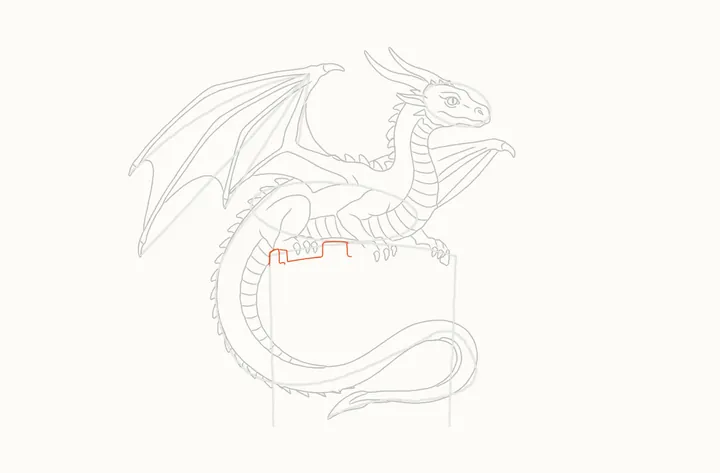
The battlements
Now the tower behind him, its top blocks. Up, across and down the first; then from its top, its thick side, along under his claws, over the big block and down.
-
Step 34 of 60
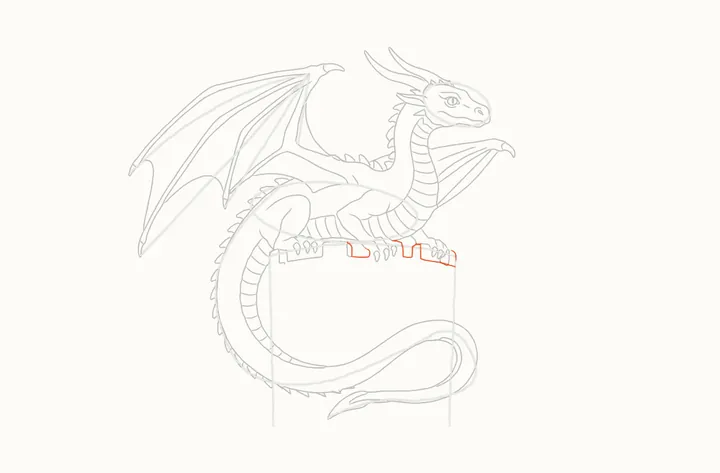
The last blocks
The big block's slanted side, then along to the front claws. Past them, up, over and down the last block and on along the top to the tower's right side; then down its corner.
-
Step 35 of 60
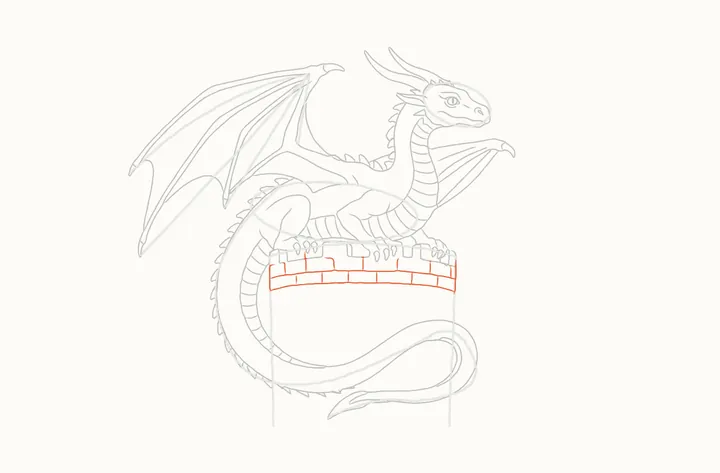
The top of the wall
Under the blocks, the wall's sides and its rows of stones: the long curved lines first, then the short joints between the stones.
-
Step 36 of 60
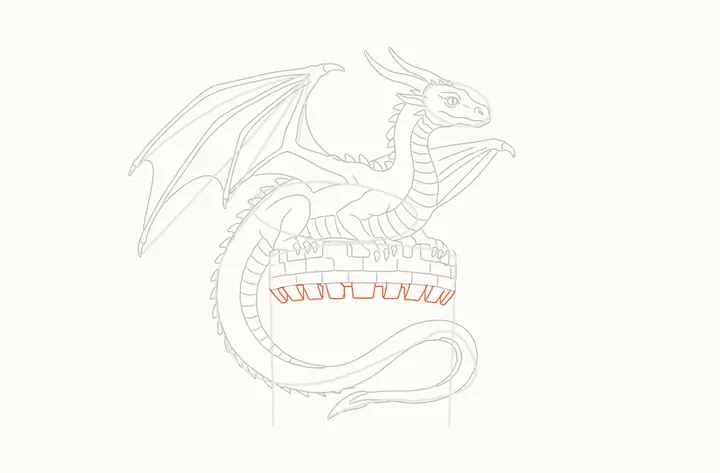
The ledge
Under the wall, nine blocks hanging down, left to right: each block's front, then one line for its slanted side. The middle block has none, just a short line in the gap before it.
-
Step 37 of 60
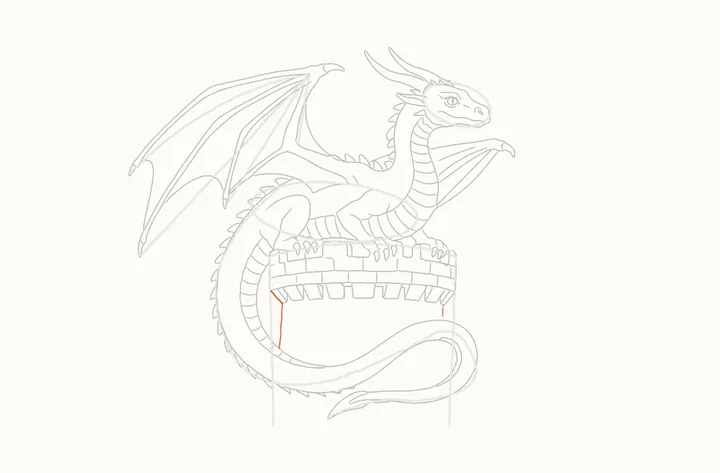
The tower's sides
From under the ledge, the tower's left side, down to the tail. Then a short piece of its right side, under the last block.
-
Step 38 of 60
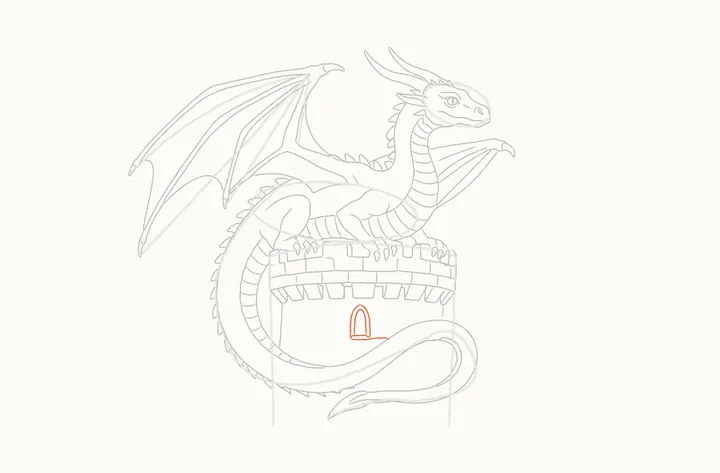
The window
Under the middle block, a small arched window: from its top, down the left side and along the sill, then down the right side and back. Then the arch inside it.
-
Step 39 of 60
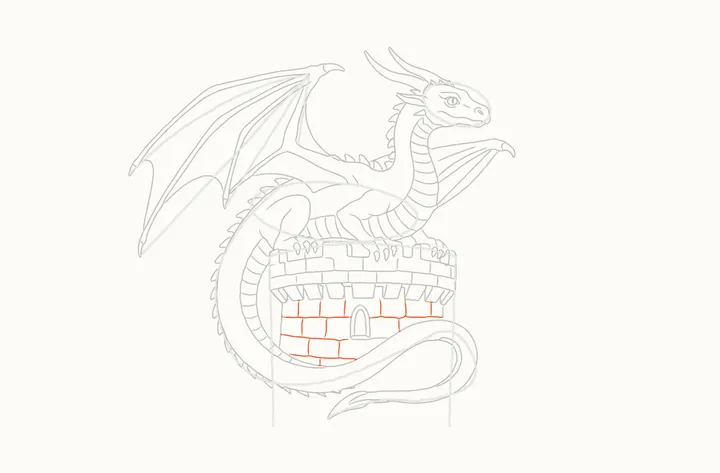
Stones on the wall
Rows of stones across the wall, down to the tail: the long lines first, then the joints between them.
-
Step 40 of 60
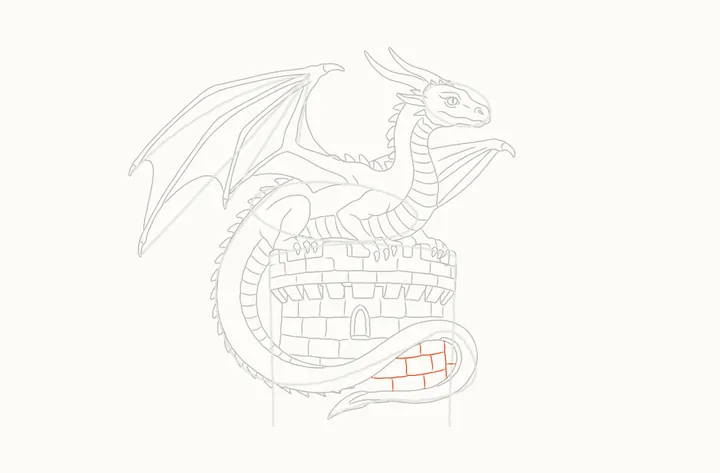
Stones in the loop
Through the loop of the tail, the tower's edge and a few more stones.
-
Step 41 of 60
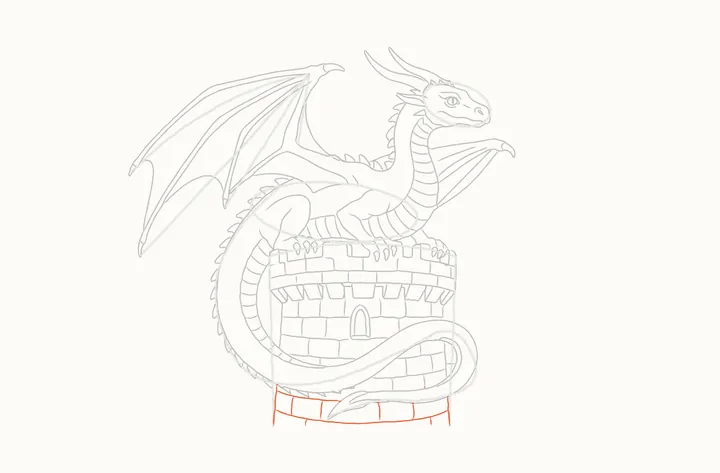
The bottom of the tower
Below the tail, the tower's two sides, then its rows of stones and the joints.
-
Step 42 of 60
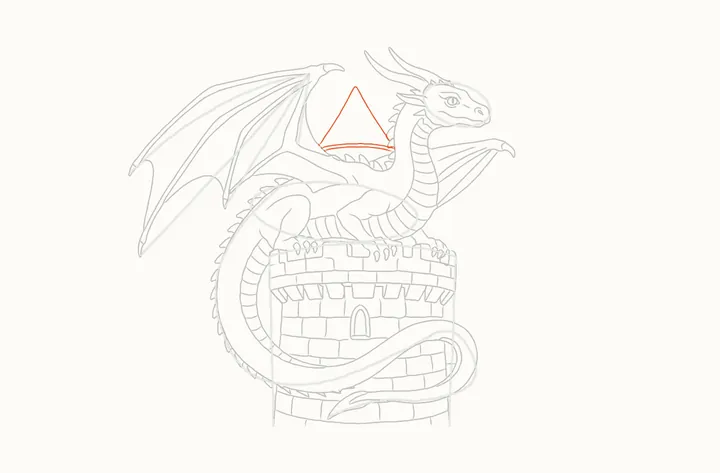
The pointed roof
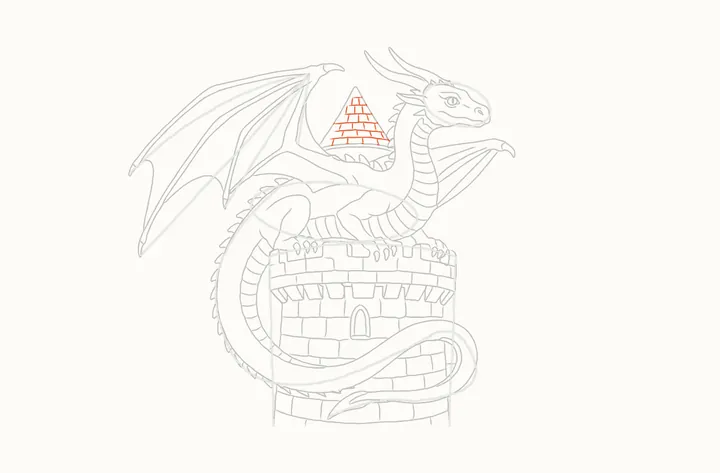
Behind him, a pointed roof: from its right foot up to the point and down the left. Then two curved lines along its base.
-
Step 43 of 60
Roof tiles
Rows of tiles across the roof, top to bottom, then the short joints between them.
-
Step 44 of 60
The hills
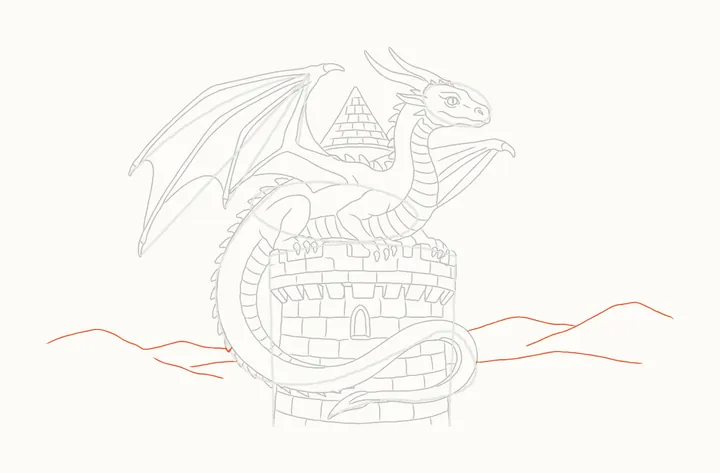
Last, the hills, lightly: on the left a long line from the page's edge to his tail, two below it. On the right, one from the edge, one from the loop to it, one below.
-
Step 45 of 60
Erase the guides
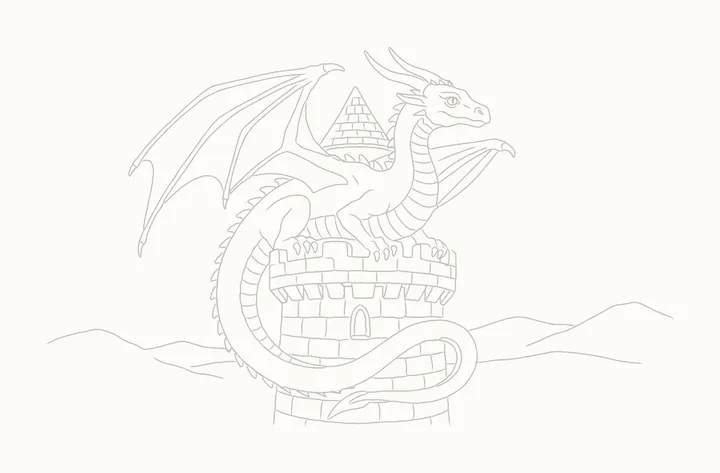
Rub out all the guide lines. Only the dragon, his tower, the roof and the hills stay.
-
Step 46 of 60
Go over his head
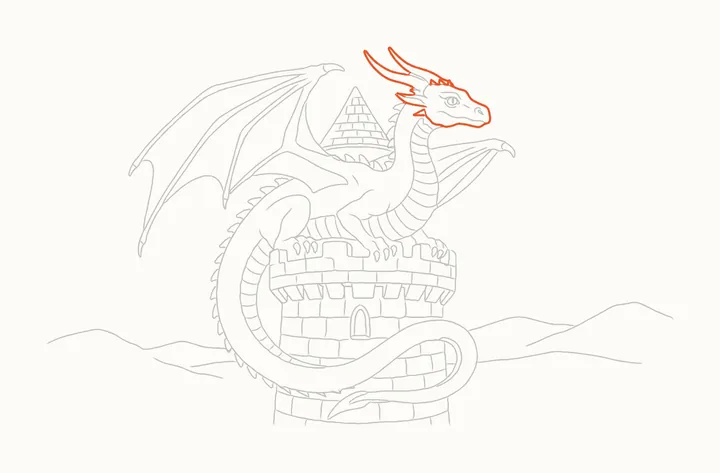
Now press harder on his outside edges: the ridges, then round his head to the spike on his cheek. Then the horns and the frill in one line, and the frill's lower edge.
-
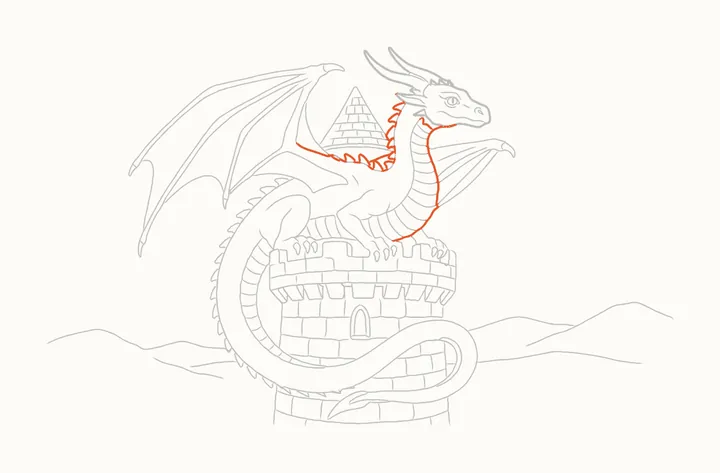
Step 47 of 60
Go over his neck and back
Down his neck and along his back, round every spike, in one line. Then the line in the crook of his neck, the front of his neck from his chin, and the cheek spike's line.
-
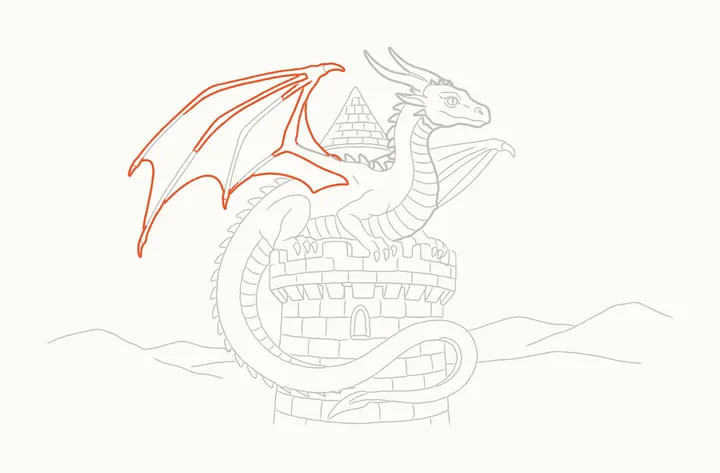
Step 48 of 60
Go over the near wing
In one line, up the near wing's arm, along its top and in and out round the tips. Then the fingers' inner edges, the last bone and its scoop, and the curve from his back.
-
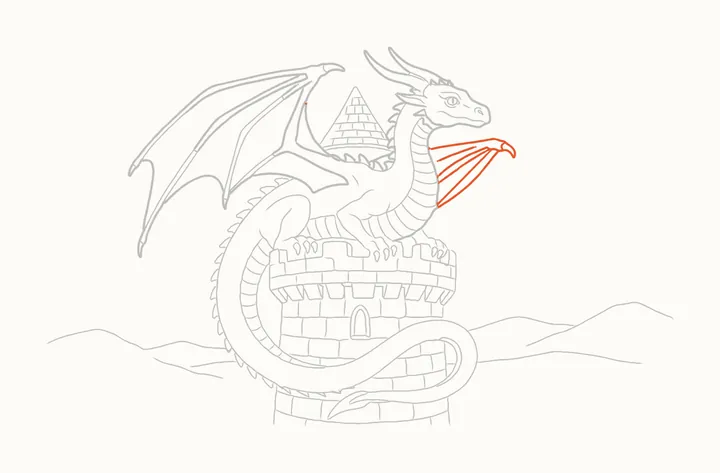
Step 49 of 60
Go over the far wing
The far wing: round its top and claw and back. From the claw, down its lower edge, back up beside it and down a line along it; last, the other line along it.
-
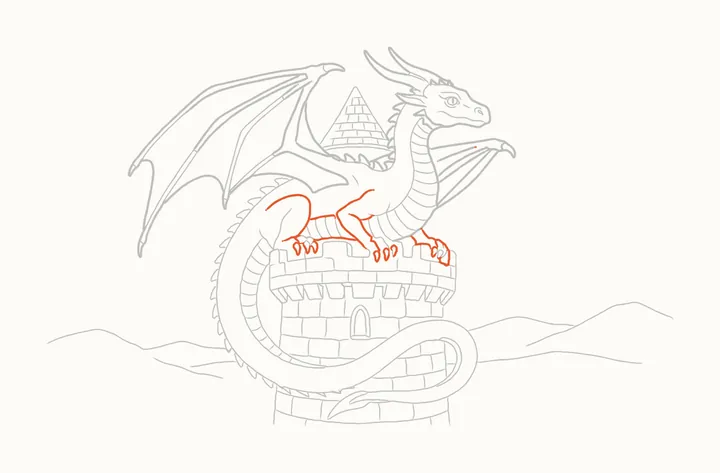
Step 50 of 60
Go over his legs
Round each leg and its claws: the near front leg, the far one, then the back leg, its claws and on under his belly. Last, the belly's top line.
-
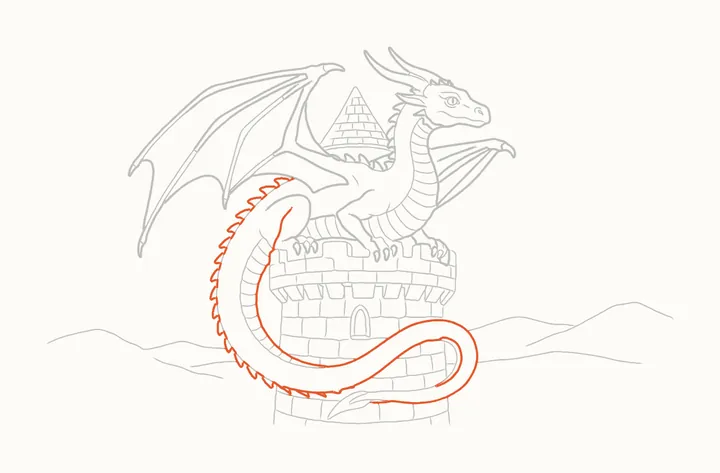
Step 51 of 60
Go over his tail
Last, the tail: down its outside and spikes, under the coil round the last two small spikes and inside the loop. Then the other three small spikes, and the inside, round to the tip.
-
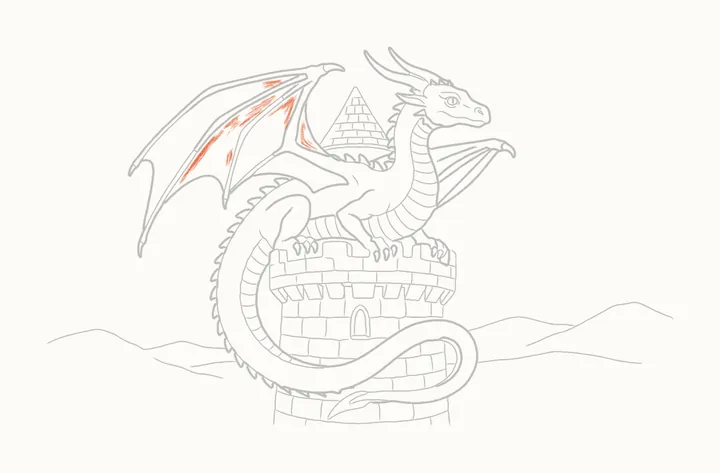
Step 52 of 60
Shade the wing
Now some soft shading. The light comes from the right, so shade the near wing's skin along the fingers on their shady side.
-
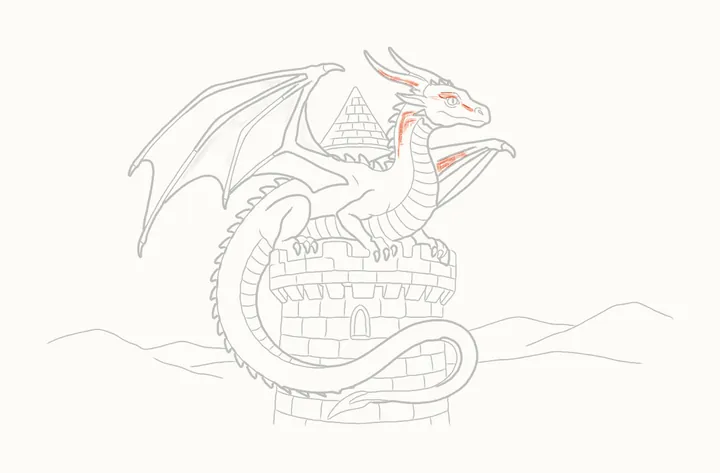
Step 53 of 60
Shade his head and neck
A little under the horn, between his brow and his eye and on along his snout, and down the back of his neck.
-
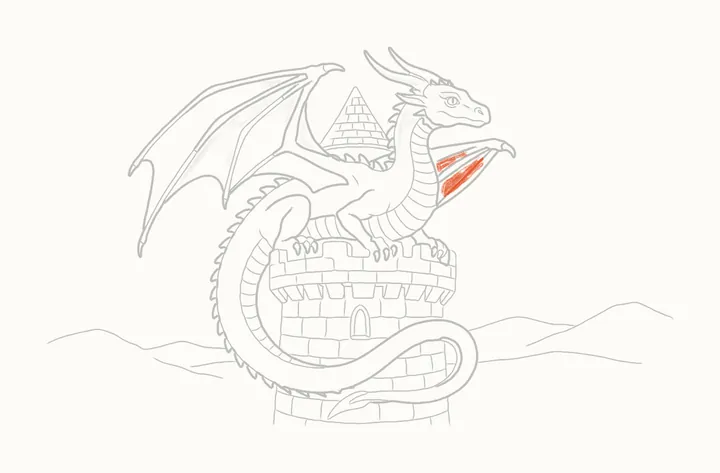
Step 54 of 60
Shade the far wing
Along the far wing's skin, under its top edge.
-
Step 55 of 60
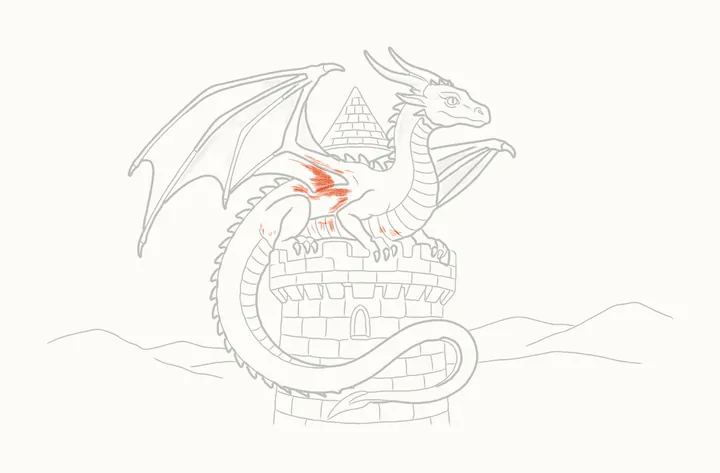
Shade his body
Under the wing on his back, under the belly, and at the top of the front legs.
-
Step 56 of 60
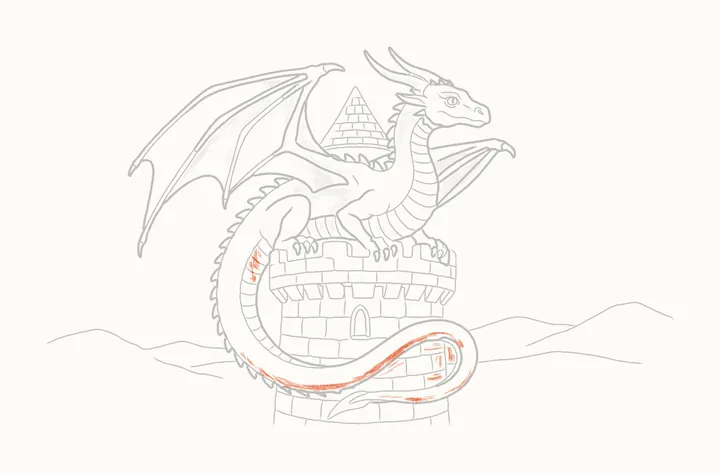
Shade the tail
Along the inside of his tail, and under the coil as it crosses the tower and loops round.
-
Step 57 of 60
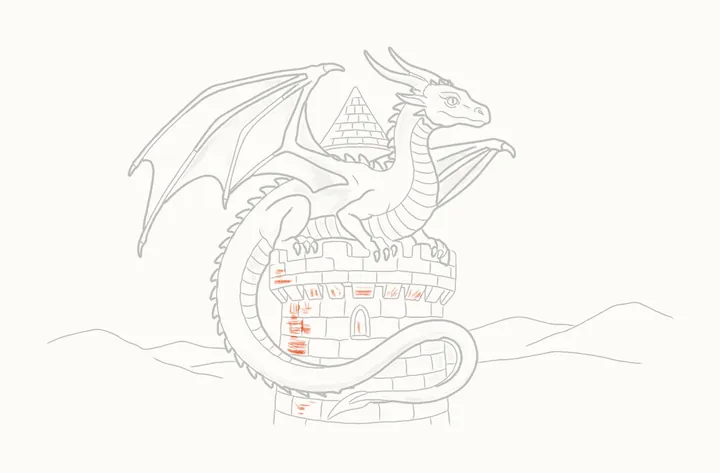
Shade the tower
On the tower: its left side, and under the ledge's blocks.
-
Step 58 of 60
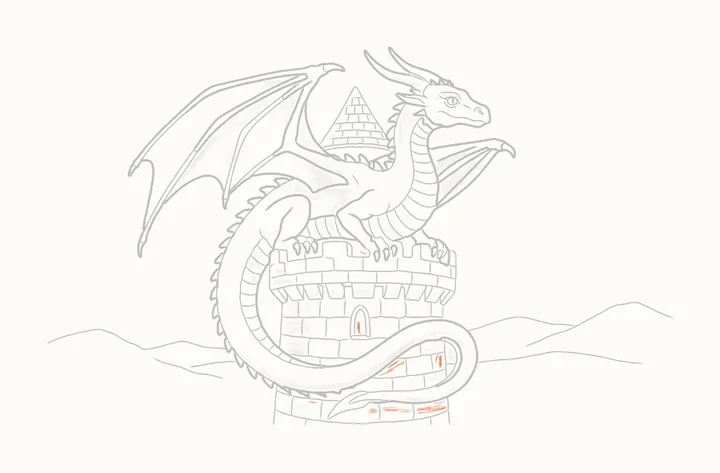
Deep shadows
Press a little harder in the darkest places: inside the window, between two blocks at the top, and on the stones in the coil's shadow.
-
Step 59 of 60
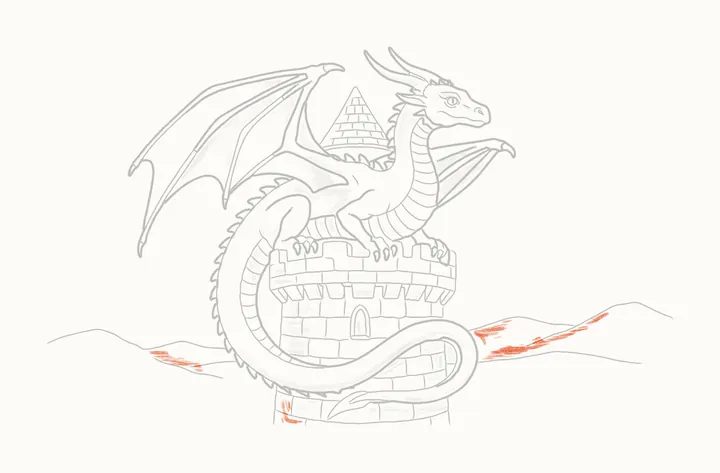
The hills' shadows
A light tone on the far hills and at the foot of the tower. Keep it soft, as they are far away.
-
Step 60 of 60
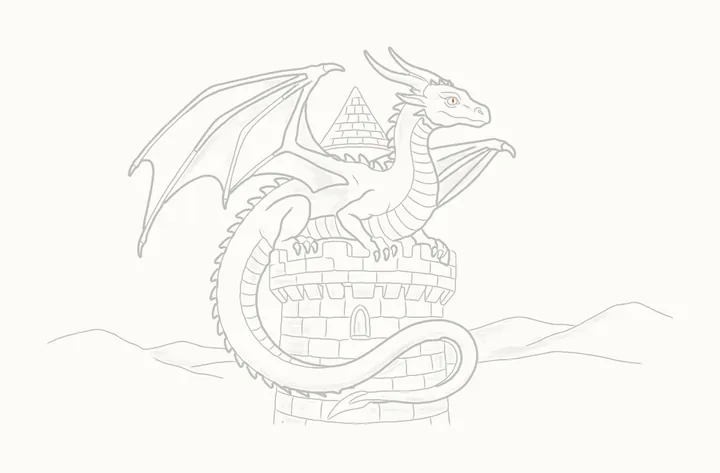
The darks
Last of all, fill in the slit in his eye.
-
Finished
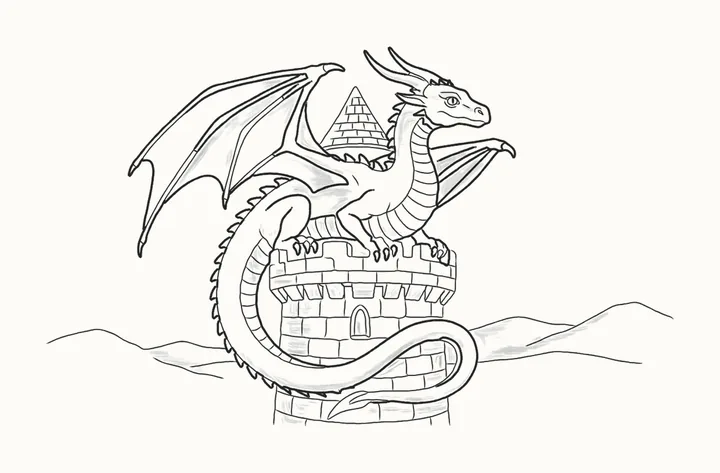
Your finished dragon sitting down
Your dragon is on guard! Go over any lines you want darker, then sign your drawing in the corner.
In the DrawRabbit app
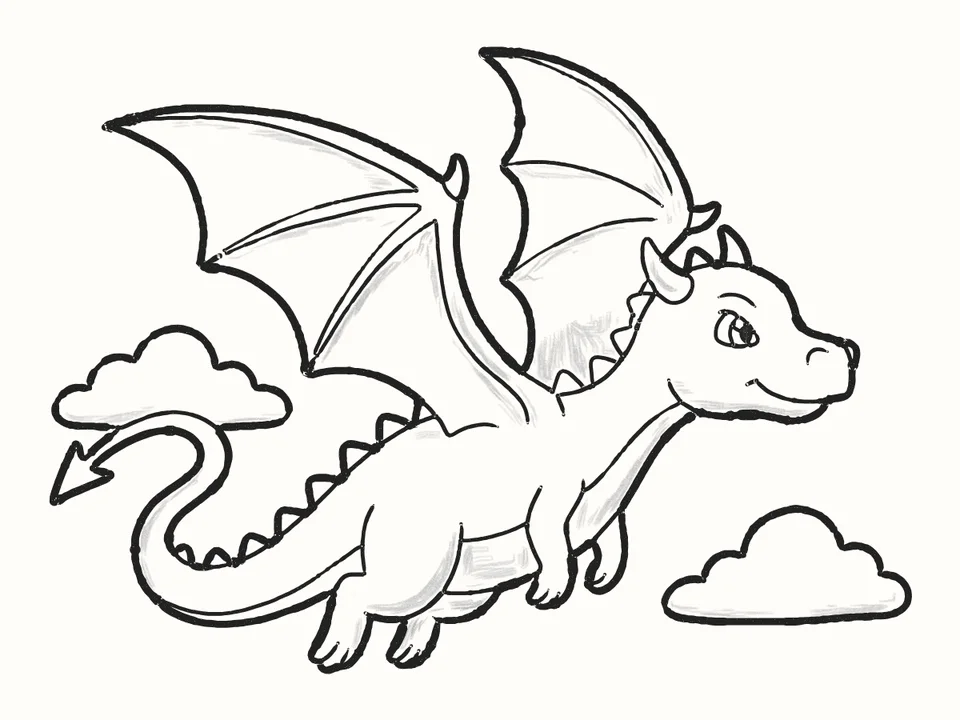
The dragon world has 9 more drawings
Every animal has a whole world of narrated drawings in DrawRabbit, each one a little story you draw with a real pencil and paper. The first drawing in every world is free.
 Free to start · iPhone and iPad
 First flight
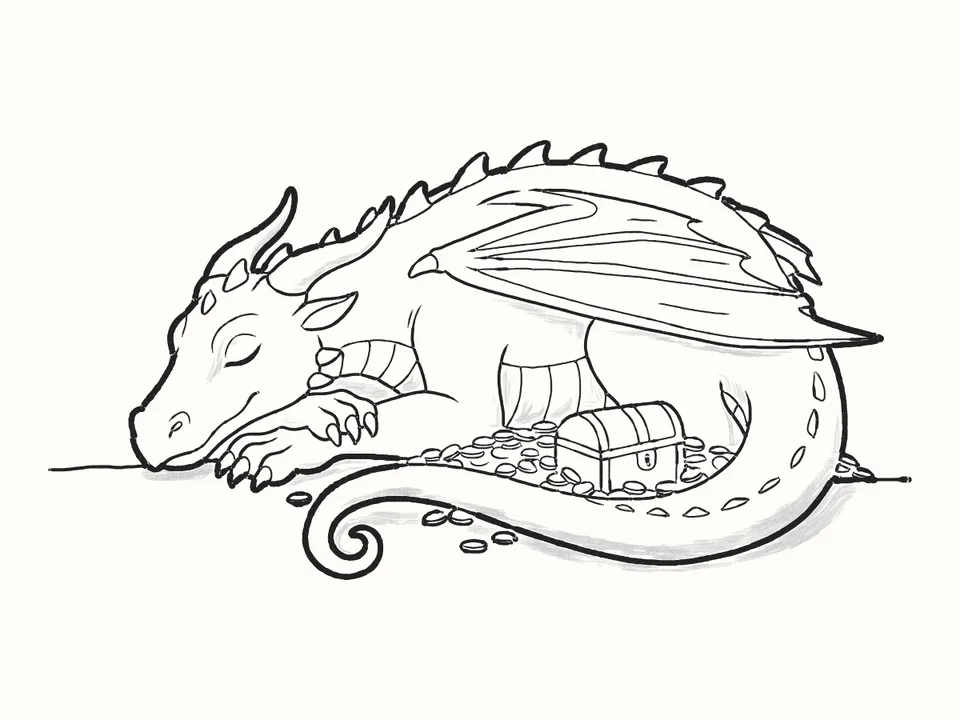 Asleep on the gold
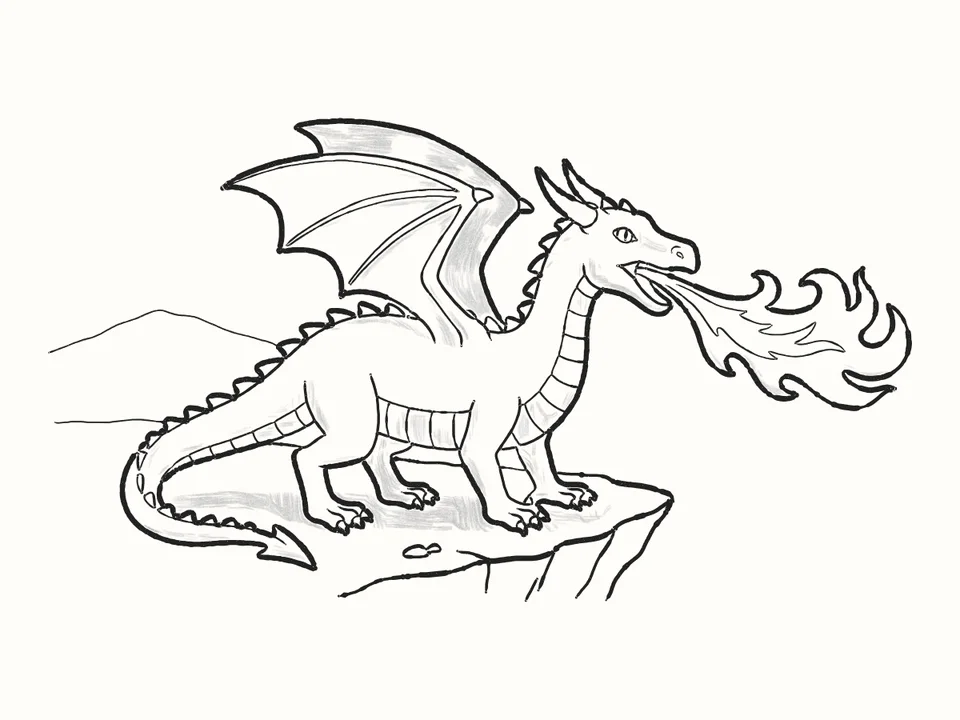 The fire breather
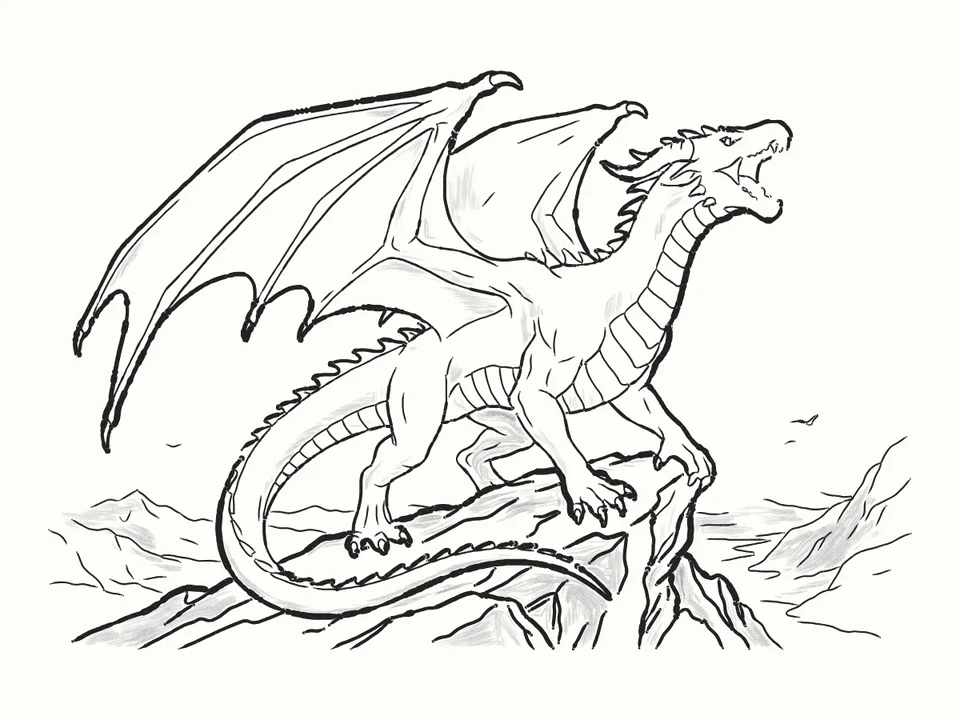 King of the mountain
Tips for a better dragon sitting down
Start with the tower
Two long lines for its sides, a little closer at the bottom, and a gentle curve across the top. His feet rest on that curve, so he sits on the tower, not in front of it.
A wing in four lines
One line from his back up to the wrist, then three long lines fanning out to the tips, the lowest by the tower. The fingers follow them, with scoops of skin between.
Coil the tail
One long curve from his hip, down the left of the tower, across the front and round a loop on the right. Fifteen spikes run down its outside, getting smaller.
Bands like a ladder
A strip runs down the front of his neck with fourteen bands across it. More bands cross his belly and the inside of his tail.
Light from the right
So the shade goes on the wing skin beside the fingers, under his belly, on the left side of the tower and under its ledge. Press harder inside the window, and keep the far hills soft.
Questions
How do I draw a dragon on a castle?
Draw the tower first: two light lines for its sides and a curve across the top where his feet will rest. Then an oval for his head up on the right, a long oval for his body along the top of the tower, the wing guides and one long curve for the tail, looping round the tower. The castle’s stones come after the dragon, so they sit behind him.
What do I need?
A pencil, paper and an eraser. Draw the first steps lightly: the guide lines are rubbed out in step 45.
How do I draw a dragon’s wing?
Start with one line from his back up to the wrist and three long lines fanning out to the tips. Draw the arm up to the wrist and its claw and along the top to the first tip, then two long thin fingers and the last bone, and three scoops of skin hanging between the tips.
Can kids draw it?
Yes. It’s made for beginners of any age. If reading the steps is hard, the draw-along talks you through each line while it draws.
What is DrawRabbit?
A drawing app for iPhone and iPad: narrated, step-by-step lessons you follow with a real pencil and paper. 95 drawings in 10 worlds, free to start, no account needed.